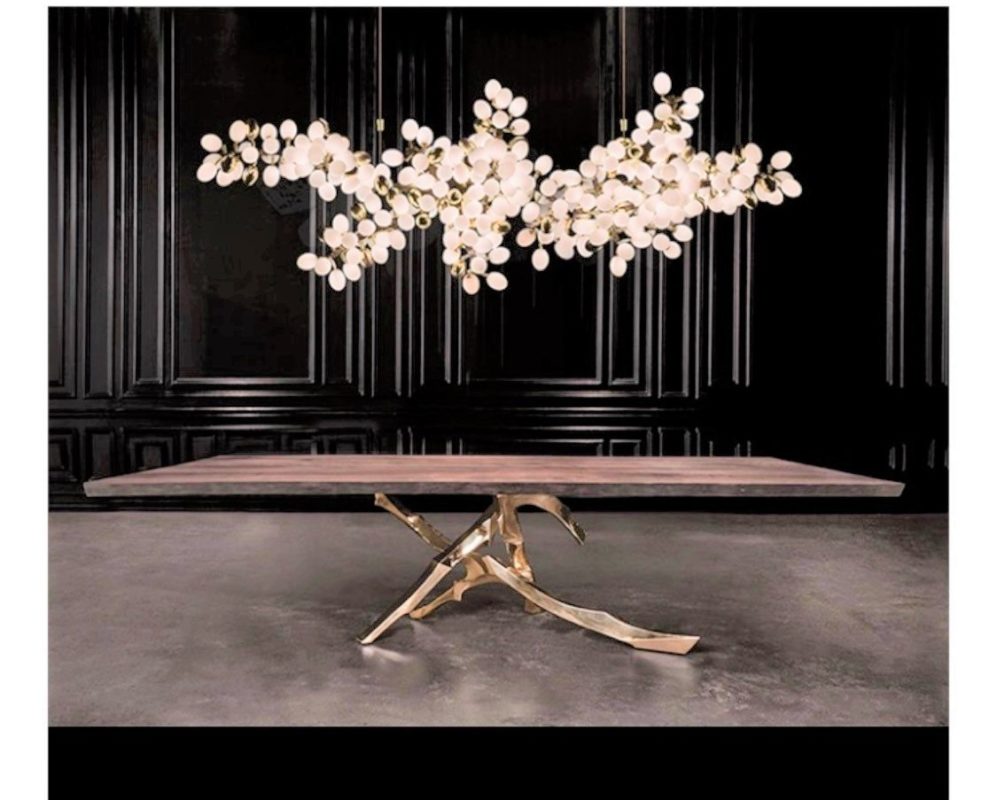
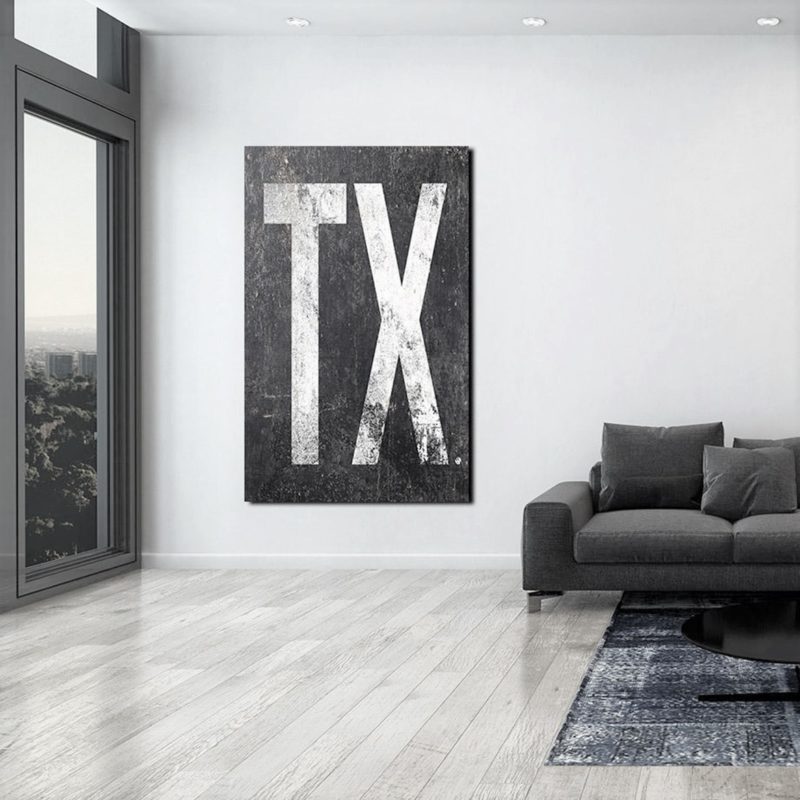
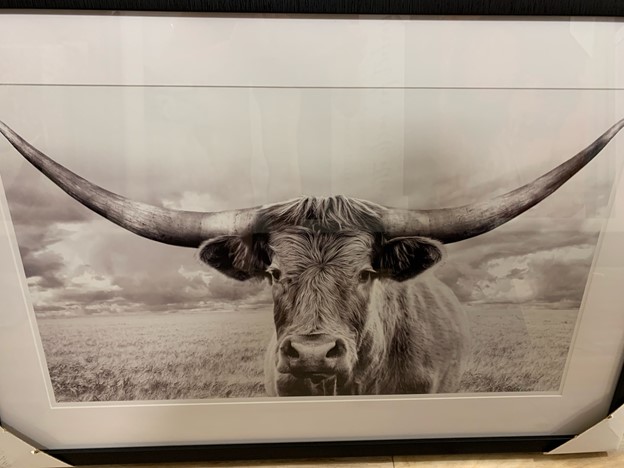
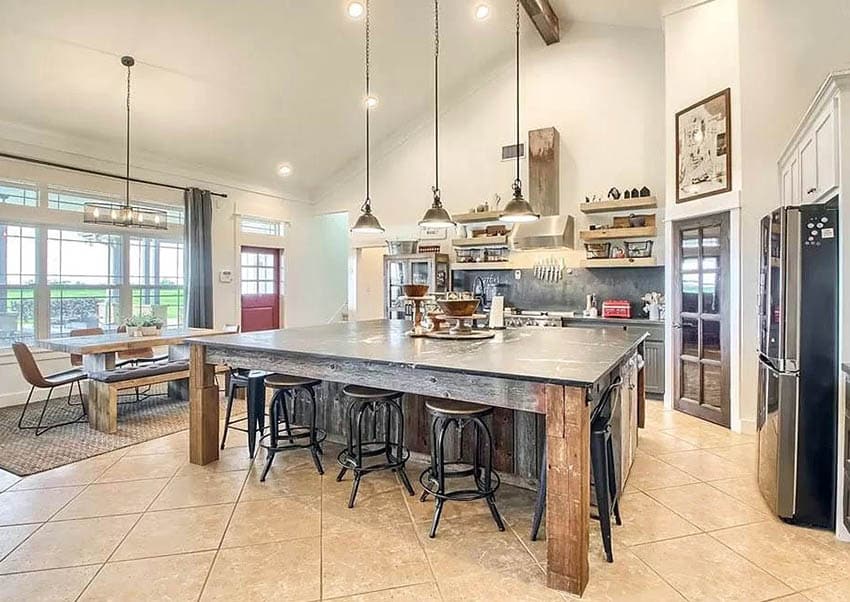
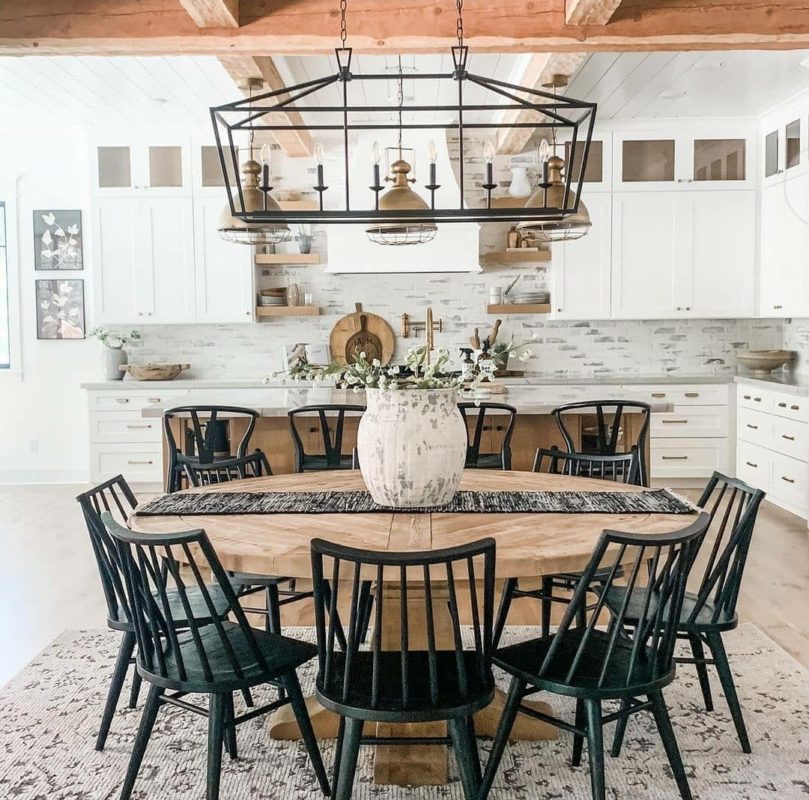
I’m helping a client who is moving to a new build home in Texas. Her previous home had a contemporary style and she wants her new home to have the same feel but with pops of rustic, Texas style without giving up her love for all things shiny. The table and chandelier are inspo pieces. The chandelier is from Hudson furniture.
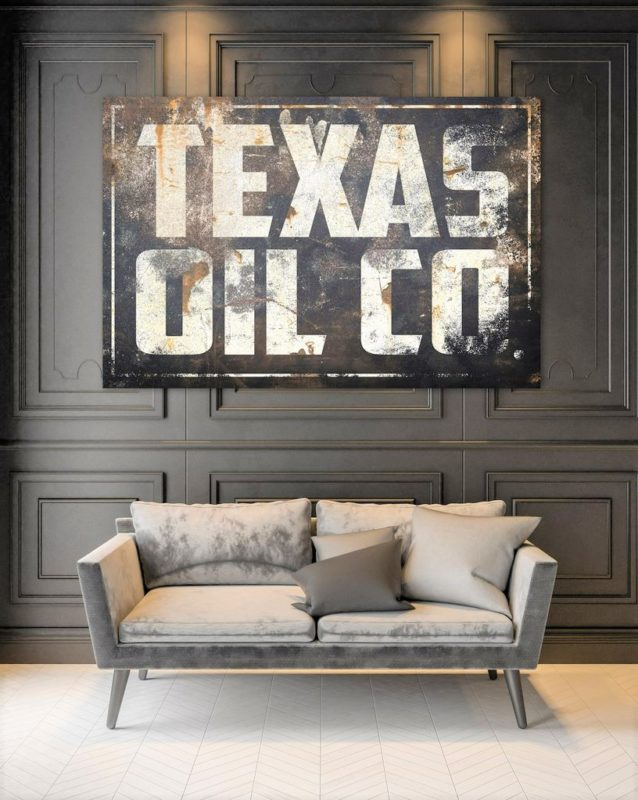
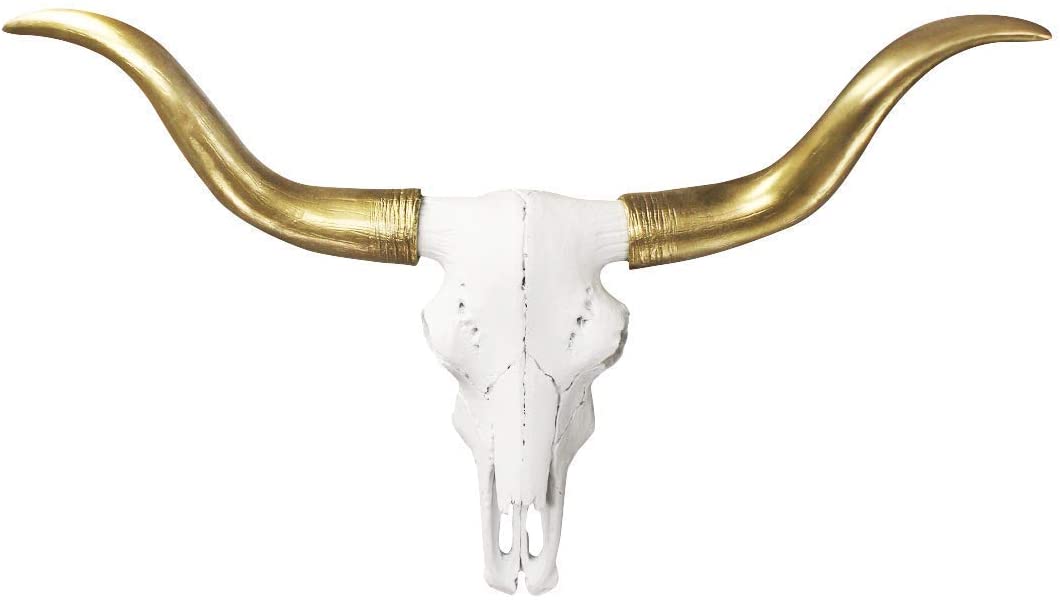
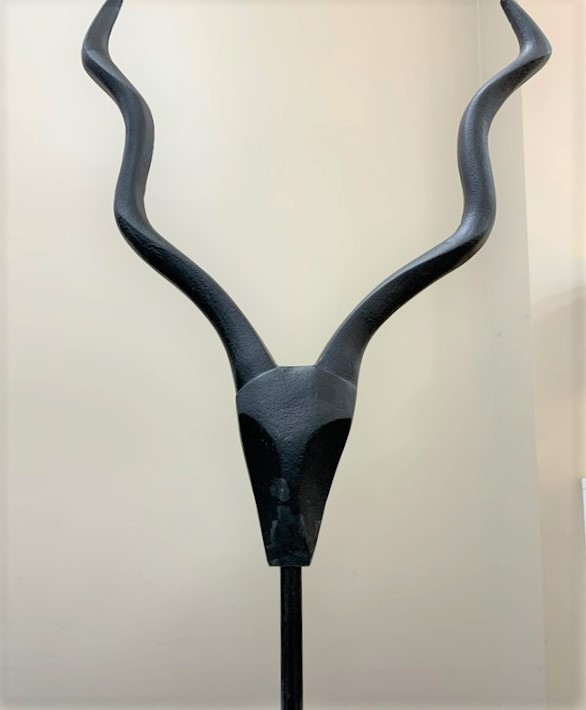
Below are some great finds that won’t break the bank, will bring the rustic in, and play well with the shine:
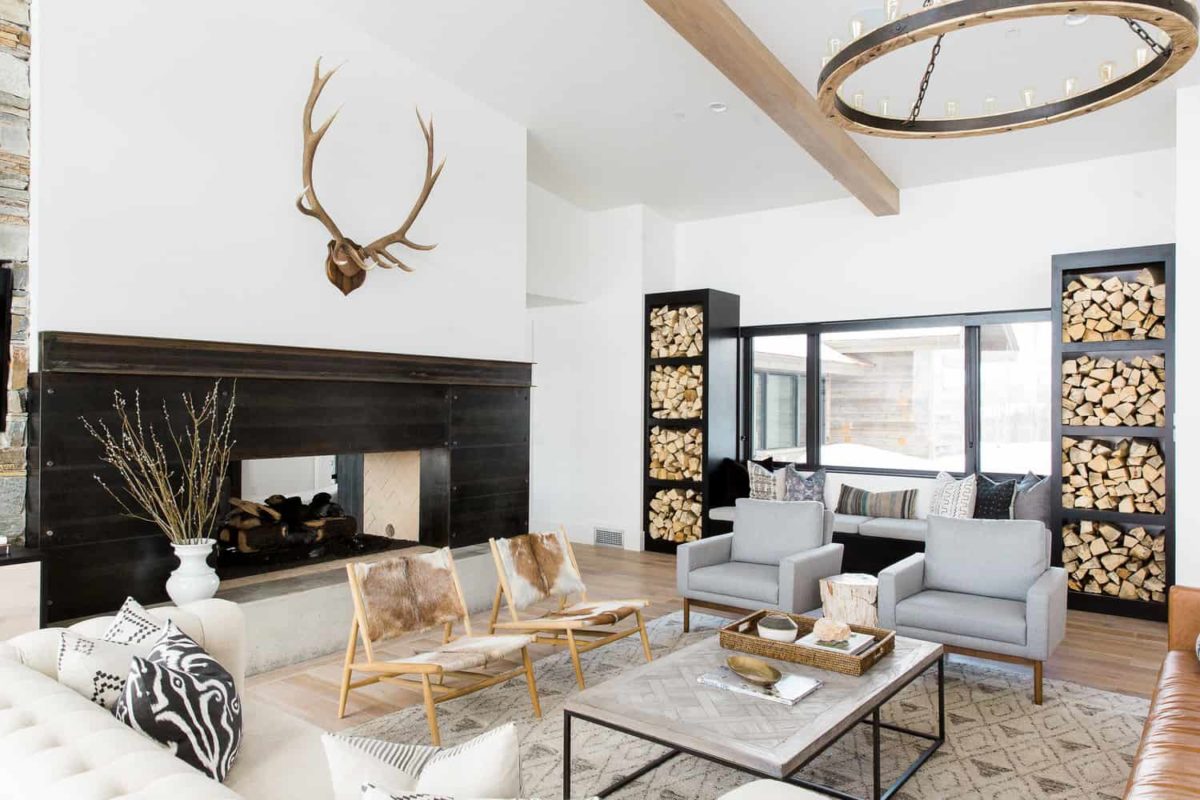
Striped Barn is working on exciting projects in Colorado
I feel like I’ve missed so much this summer but I’m so excited to be in CO working on a few projects especially with Fall right around the corner… the beginning of my fav seasons…so let’s catch up!!
As you know the housing market is crazy right now and we welcome the addition of darker accent colors like black windows, doors and plumbing fixtures that are going strong in interiors…paired with rustic neutrals and textures…its stunning!
Source: Onekindesign.com/studiomcgee.com/Phillips Development
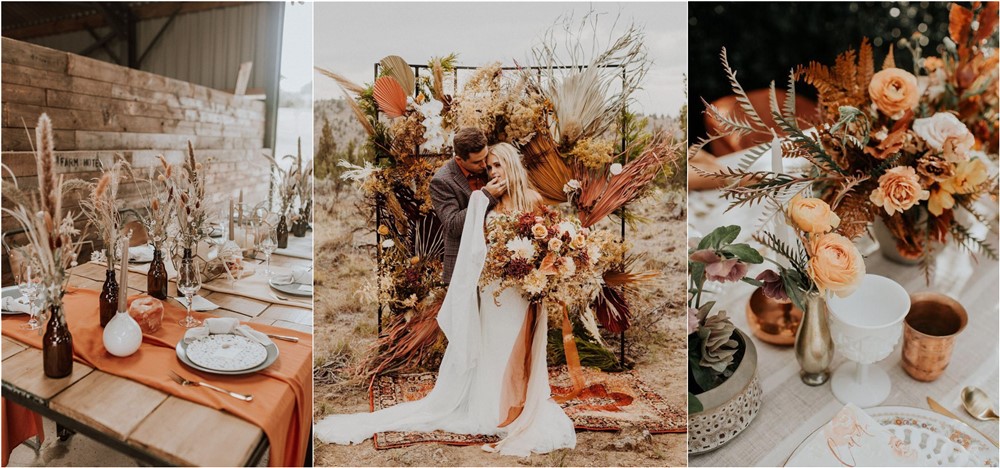
Weddings and events are back and there are some new trends out there…but I feel that wedding décor is such a personal choice and something we’ve pictured in our mind way before the years trends arrived!
Source: rosesandrings.com
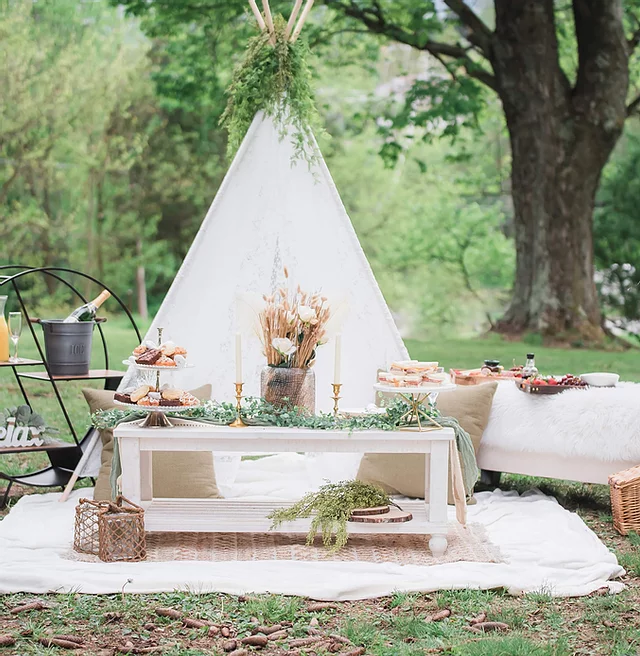
One good thing that came out of 2020 was pop-up styling! Picnics and grazing tables are so much fun, and I am super excited to be doing these with themes!
Source:pictureperfect.info
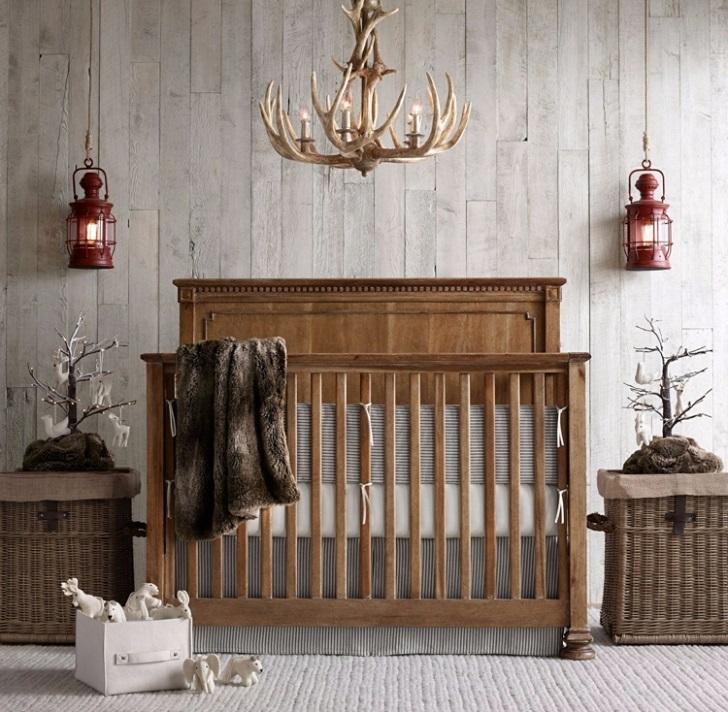
Another one of our favorite thing’s is the gift of design! Add a Striped Barn interior design consult to your wedding registry or your baby registry for a trendy baby’s room…and yes, we do destination design! It really is the gift that keeps on giving!
Source: deavita.net
We love sharing exciting behind the scenes inspo so be sure to look for our “Behind the Barn” inspiration pieces!
Free 15-minute virtual design consultation or as I like to call it creative brainstorming!
Email, call or zoom me today… Let’s create your vision, I love to talk design, and I can’t wait to hear from you!
Its just about summer and that means moving the festivities outdoors! What better way to welcome friends, family and guests than with a little extra style! Outdoor decorating is easy, fun, and casual and definitely less pressure than indoor parties!! There’s the key right there…easy and casual…Think about how simple it is to decorate outdoors… no holes in the walls, and you can just throw lights up over the trees… nature is your best friend when it comes to outdoor entertaining…(except the wind that’s never fun lol) and a little goes a long way! Whether its backyard entertaining, an intimate dinner or the perfect event, here’s some great inspo to get you started!
TIP: If the wind comes up or you have to plan for wind, just anchor everything down with heavy tape or weights
Source: Apartment Therapy
Natural, organic, farm to table style, one of my favorite go to’s! Can be as elegant as it is casual.
Source: Apartment Therapy
OK…love pallet tables… my fav pop up party idea! They go anywhere and make a big statement!
Source: Borrowed and Blue
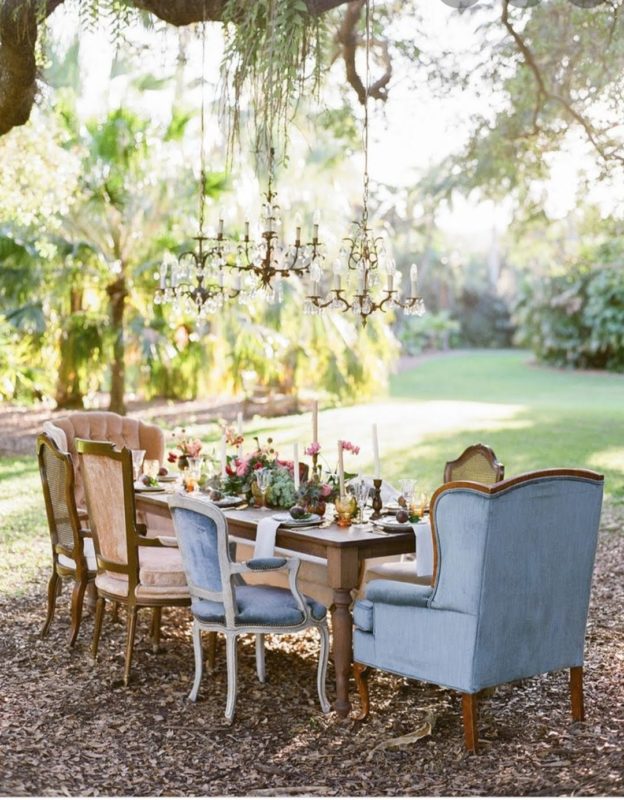
Want to make a statement? Bring the furniture outdoors, another one of my go-to’s… now thats a party to remember!
Source: Deer Pearl Flowers
This is as simple as it is cute, everyone should have one of these!
Source: Homedit
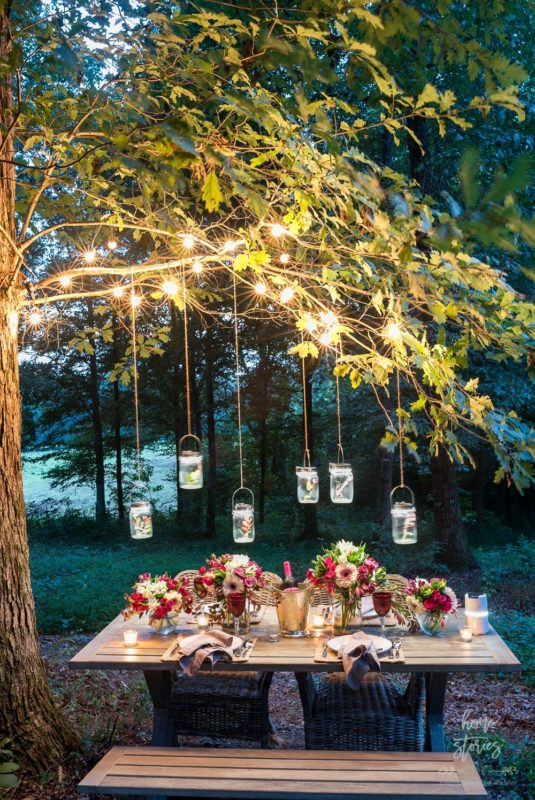
Outdoor decor is not complete without fairy lights and/or lanterns…its a must for outdoor entertaining!
Source: Wide Open Eats
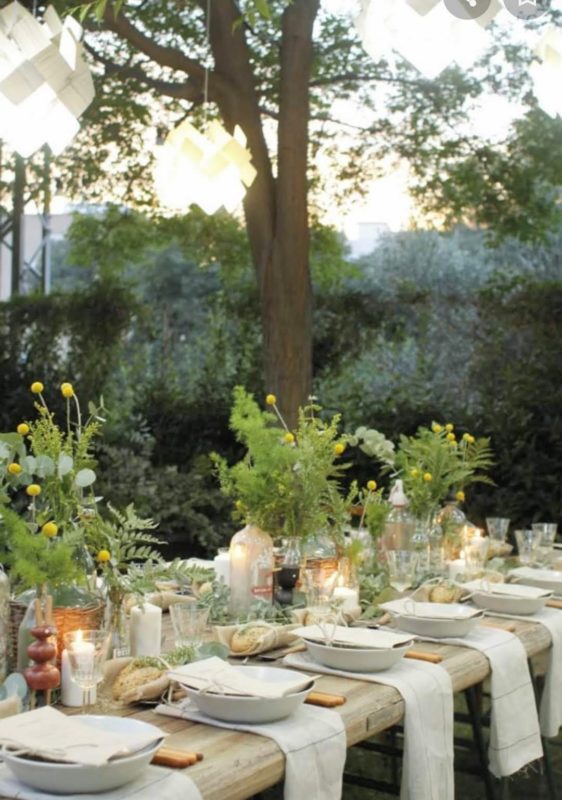
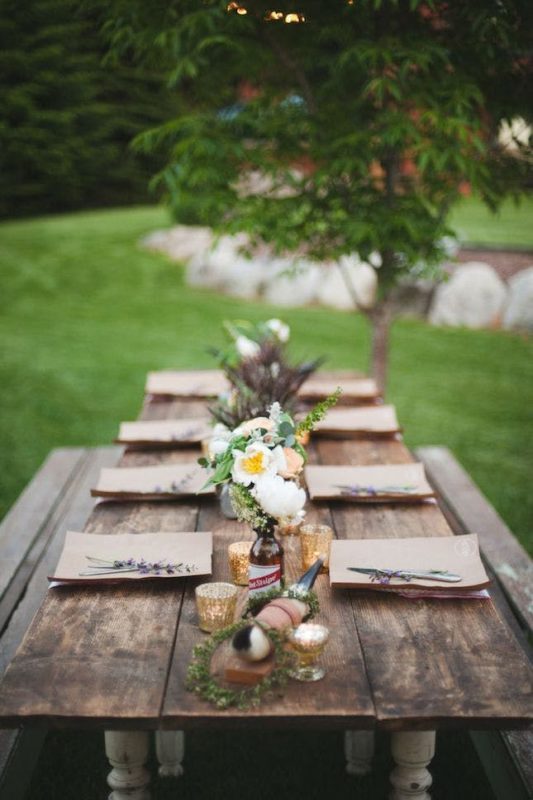
I love everything about this table…one of my favorite things is to use bottles for flowers and greenery…decorative bottles, beer bottles, wine bottles!
Try some new styling ideas this summer…so easy, inexpensive, festive, and fun! Your family, friends and guests will notice!
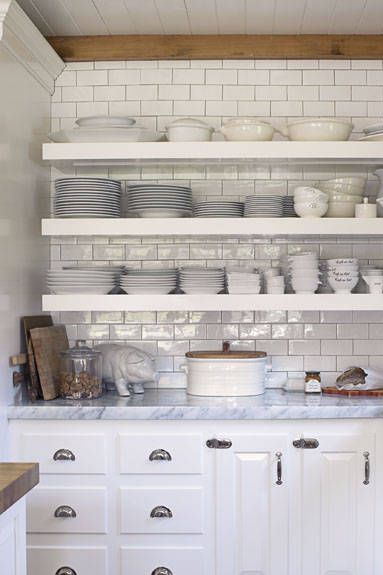
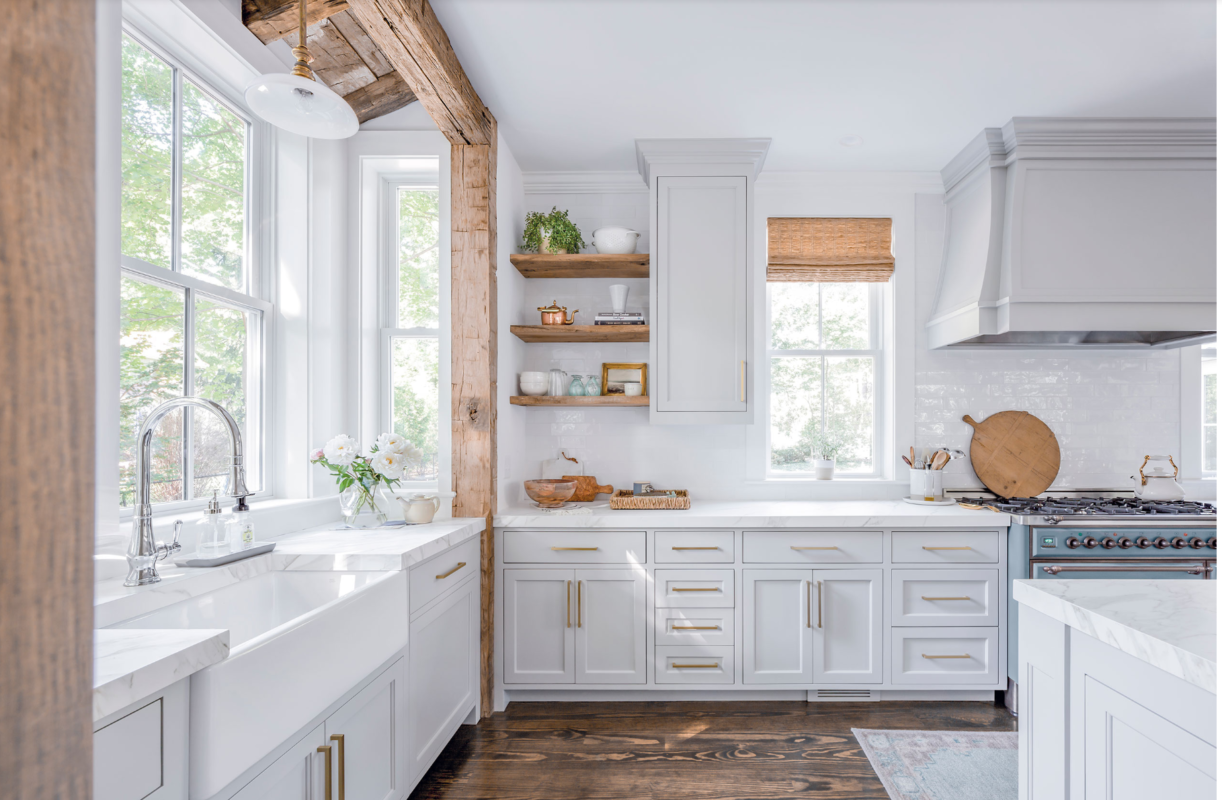
Open kitchens speak to you…they are simple, cozy and relaxed. Like the feature kitchen shown from dlmag/Bharat Bhushan. Open shelving is so much fun, it gives your kitchen personality and character! You can not only display your fav dishes, they’re inexpensive (especially compared to cabinets)…and you can style them for every season, occasion and holiday!
You may not be ready to rip out all your cabinets and put-up shelves, but you may want to do a few! You could even do half and half. As a lover of all things neutral, most of my dishes are white and my glassware clear and I love them on open wood shelves. We all have a few things we’d rather not display but why not display what we love and keep the rest hidden away?
TIP: Shelflessness – my word for not hiding everything in closed cabinets and sharing what you have
Source: Architectural Digest article from Sanctuaryhomedecor.com
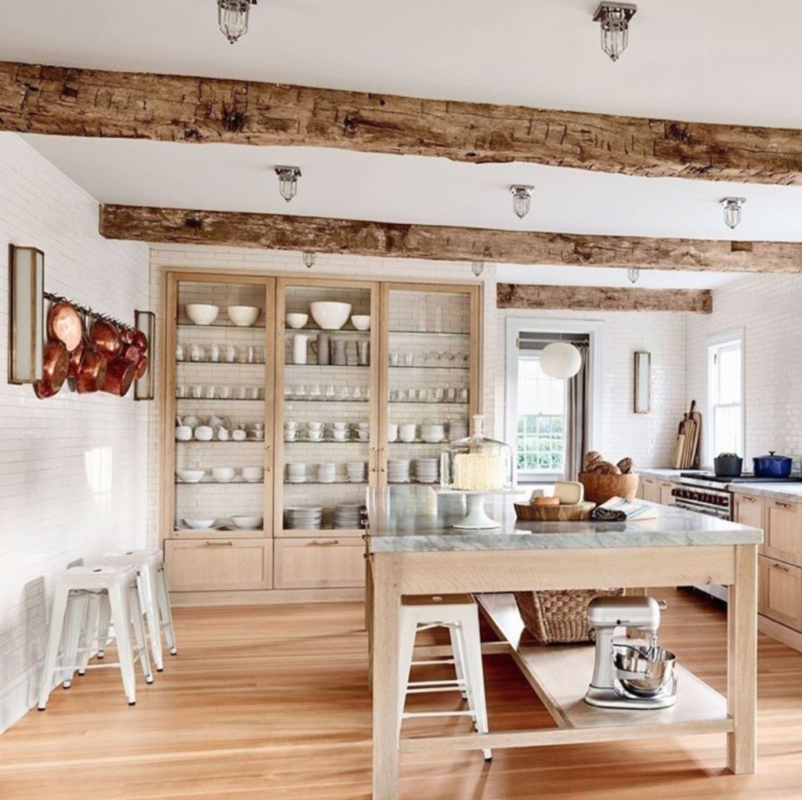
If you’re not sure about going fully open, you can always go with glass fronts. This is one of my fav kitchens, it reminds me of a Nancy Meyer kitchen from all of my fav movies! And those hand hewn wood beams are gorgeous!!
Source: House Beautiful/Sienna Livermoor/Gridley and Graves
If you go all open you make a statement…it’s a big step but once you do it you’ll love it…its fresh, trendy and I bet all your friends will be envious! And don’t forget…you still have all those lower cupboards and drawers!
Source: Sanctuaryhomedesign.com
Undecided? A few shelves with traditional cabinets is always a great option and you get the best of both!
TIP: Open it up! Open floorplans, open kitchens, open shelves
As I always say, less is more so open up your kitchen, you’ll love it! (You can go buy those new dishes with all the money you save on cabinets)
As home designers and stylists, we are always looking for that next creative spark. The cuteness factor for this pic from @farmhouseunique, photo by @thermaland.oaks is off the chart creative so I wanted to share, especially since I was posting about styling this week.
We are not all lucky enough to have cute baby goats, or bunnies running around for our springtime decor …maybe someday… but until then…we can still get creative with quick and easy spring decor. So get inspired and do some DIY spring styling!
TIP: Whether you like “a pop” or “a lot” … color is a quick and easy way to bring in spring
There are 3 super easy “foolproof” ways to style:
1 – Group
2 – Line
3 – Sprinkle
Source: Hikendip
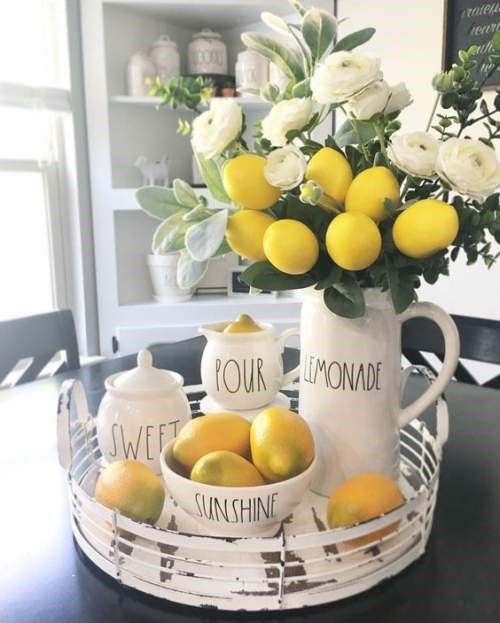
The trick to a “group” display is picking different heights and scales, if everything is the same it will not work. A group can work on a table, island, shelf, porch or anywhere!
TIP: You can group items with out using a tray or bottom piece.
Source: town-n-country-living.com
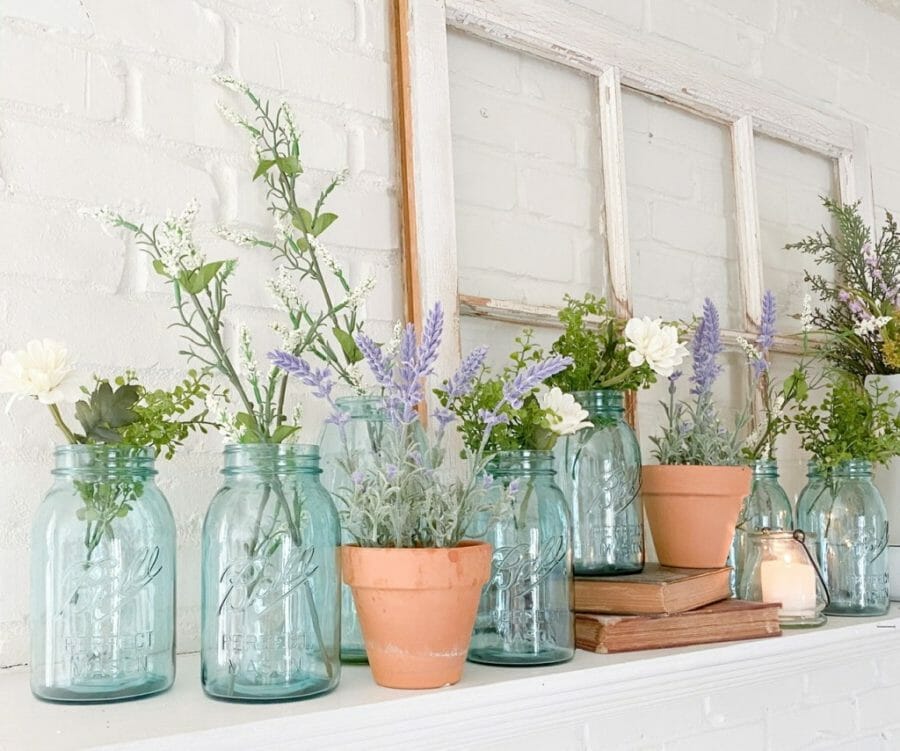
A line is a great, super quick way to display and style items. This is often used going down the center of a table, a shelf or mantel. Just line your items up either straight or staggered.
TIP: You can duplicate the same items over and over or change it up as shown above.
Source: town-n-country-living.com
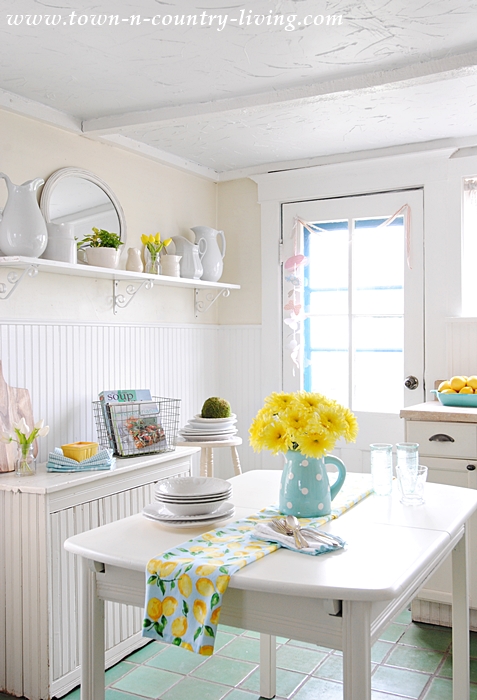
Sprinkle styling is the easiest of all. Just bring out all your favorite spring decor and “sprinkle” it all around your home. No styling needed!
TIP: You can still do lines or groups within your sprinkle!
Styling is fun and easy and adds a quick season or holiday vibe to any space!
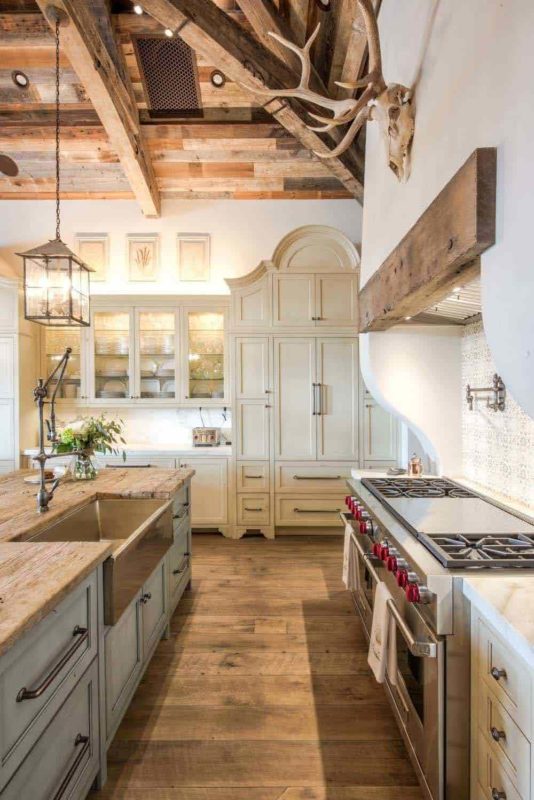
What’s your perfect space? We all have a certain style or certain elements that catch our eye and speaks to us. We’ve all had that moment when we see that pic that fits our vision of the perfect space. One that checks all the boxes in our designing mind…But many times, it’s just one or two things in that pic that click with our vision, so we gather those things and keep looking until we have designed our perfect space.
TIP: Lighten, have fun and choose what speaks to you…don’t take it so serious
Source: onekindesign, design by AE Interiors
This Texas kitchen design from onekindesign, designed by AE interiors is a great example because it has so many amazing things in one space. For me this is an overall dream kitchen, and I wouldn’t change a thing, everything in this kitchen speaks to me. The use of wood, especially that floor… the counters, the cabinets, lighting, and accessories. Even the red knobs and the farmhouse sink are all things I love.
But…it’s up to you to figure out what YOU want in your perfect space. Remember it’s your space and you get to choose! You might look at this space and see things you would keep and things you would change. Maybe you don’t want a farmhouse sink, or antler décor but love everything else? Maybe you don’t want a wood floor or want dark cabinets? That’s what’s so fun about “designing” our own space…we get to choose what goes in it!
TIP: You know it when you see it…don’t follow trends, follow your gut!
Think about how lucky you are! Can you image what it would be like if we had to buy a kitchen completely decorated “as is” and there were only 5 designs in the whole world to pick from? When designing your space, and that is the keyword “your” space… take your time and make sure you love everything you choose…make it “your” perfect space!
Any questions…just email me, I love hearing from you!
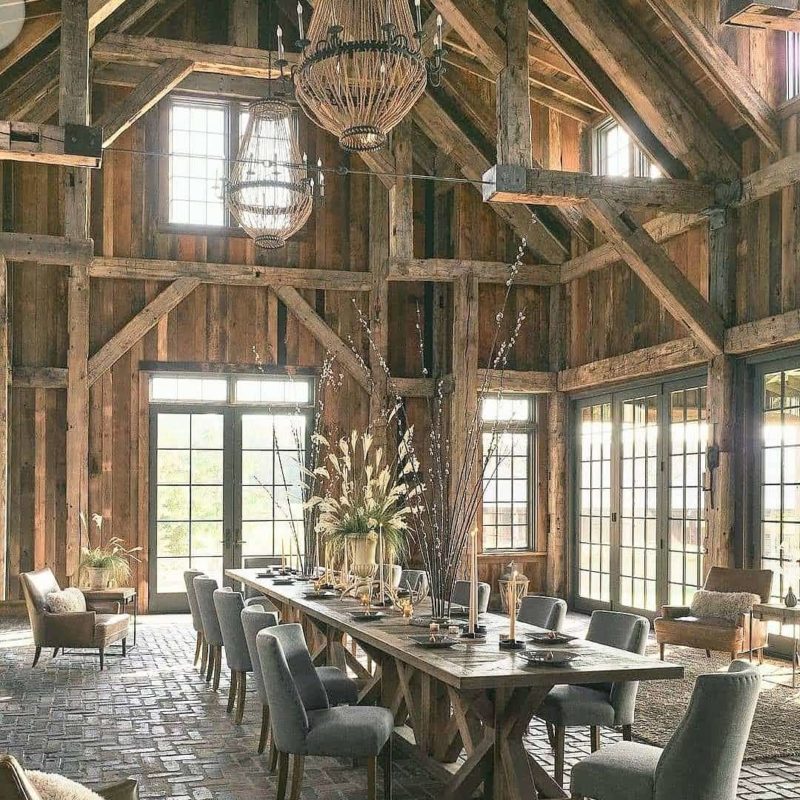
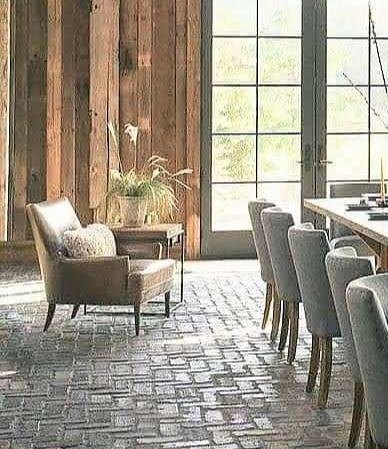
As a designer I get called a lot to style a space. Homes, events, weddings, parties, and outdoor spaces. It’s so much fun to be creative with a purpose and I want to share that with you. Here’s the 101 on styling… Let’s talk about large spaces. Large spaces are prob the easiest space to style but also can be the most intimidating. That big, oversized room that has no definition, those amazing tall ceilings that seem to reach to the stars, or that large outdoor space that has no boundaries can be overwhelming…but its easy using the 3 P’s.
1. Prepare – Clear the clutter, less is more
2. Placement – Pick 1 large item to stand out and take center stage when possible
3. Pieces – Use the right scale items, go up, and layer
Let’s look at this, gorgeous barn space from www.mountainliving.com credit: John Heaney. …which I just happen to be in love with!! This is a big open frame that needs a large-scale item to take center stage, this table and chairs did just that.
TIP: Make sure the chairs match the scale of your table
Large areas are usually defined by a focus area or by using repeated groupings which you will need to use if you need more seating for a larger group.
TIP: If you need multiple seating groups you can still style each table in the same manor, keeping it light and airy as you go up.
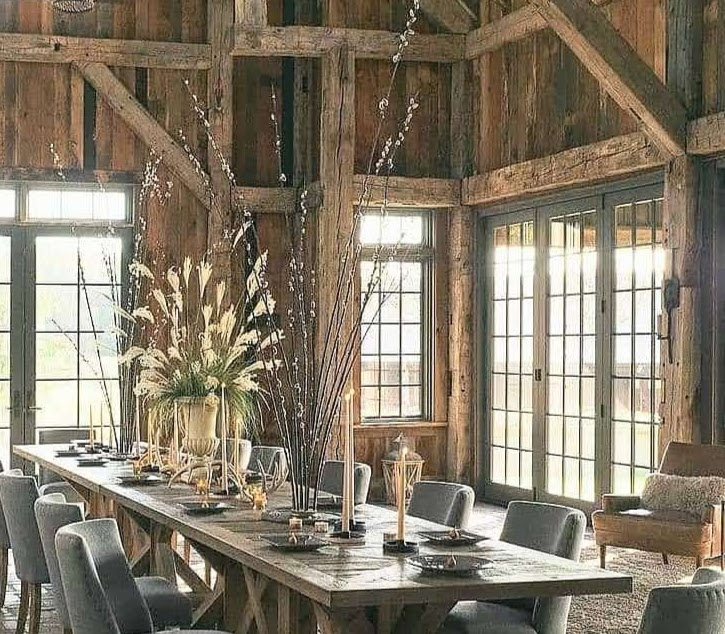
First, start with your next largest items…the tall height of the arrangements that fill in the empty space between the table and the high ceiling are perfect down the center of the table. As you can see when you have the perfect pieces…less is more!
Second, layer with various lower pieces in between to fill space and create interest but keep it light and don’t fill every inch. Congrats you just made a group that connects space!
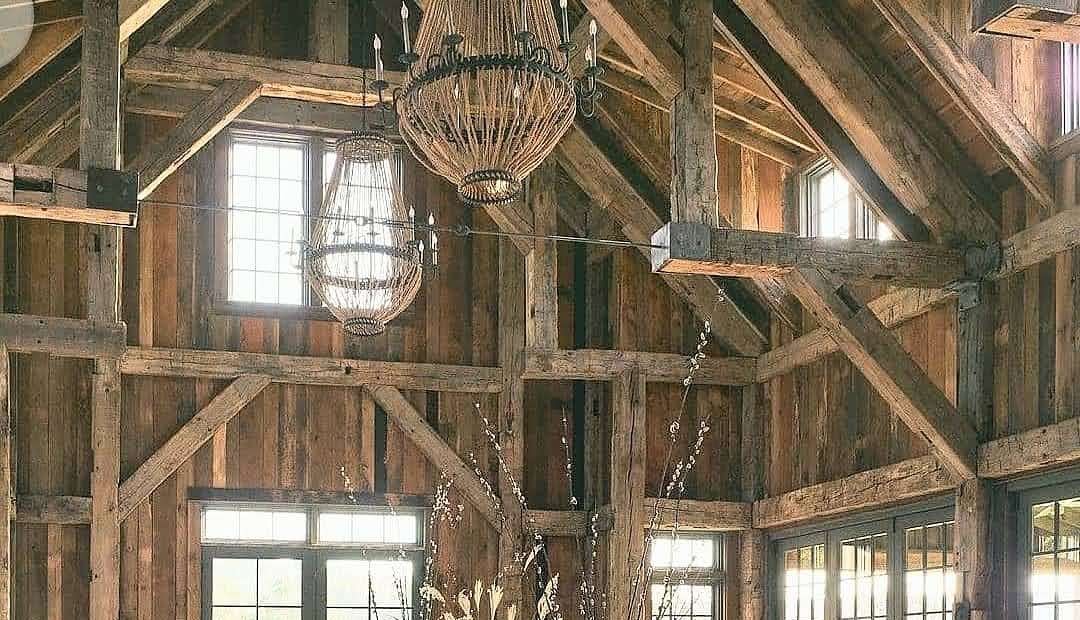
TIP: With ceilings this high you still have a little more space to fill in between your tabletop design and ceiling to keep everything connected…this is where you want to add a large-scale chandelier or hanging pieces if there isn’t already one in your space.
Once you’ve created your center stage then move to other areas of the room, but remember the rest is background décor, so stay with your larger scale but go down a size or two. If the outer pieces are too big, they will fight with your center stage.
TIP: When you have a large space, you tend to want to fill it up with as much as you can…DO NOT do this…do the opposite and select a few choice pieces and style it up! This not only allows your guests and pieces to BREATHE, but it allows you to take experience every bit of the design and architecture of the space!
I hope your already thinking about your next design…email me for questions, ideas and inspo!
Remember the 3 P’s for easy styling success!
Prepare – Clear the clutter, less is more
Placement – Pick 1 large item to stand out and take center stage when possible
Pieces – Use the right scale items, go up, and layer
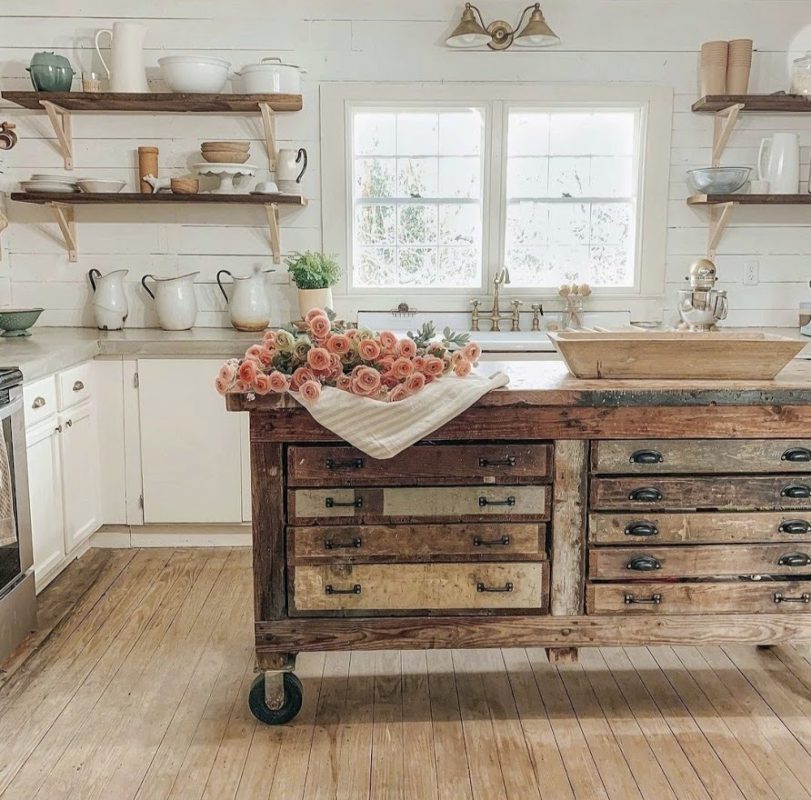
Kitchen islands are the personality of your kitchen like this one from @our1917Farmhouse. There are a million kitchen islands out there to be found… each one more unique than the last.
I always say “Good design gives them something to talk about”!
You can have a big rectangle built in the middle of your kitchen, throw some granite on it and have it match the rest of your kitchen, or you can hand pick something with character. If your reading my blog I’m guessing you are more of an option 2 type of person…
TIP: Have more fun with your design and decorating and don’t be so serious about every piece you choose. Your not designing a museum, your designing your personality, character and lifestyle.
Source: The Shabby Creek Cottage
You can use anything you can think of as long as it fits in your space and holds enough weight …and think of how much fun you’ll have looking for it…that’s the best part! Flea markets, garage sales, antique stores, estate sales, even your own garage or backyard!
TIP: Match the scale of your space, don’t go too big or too small.
Source: The Shabby Creek Cottage
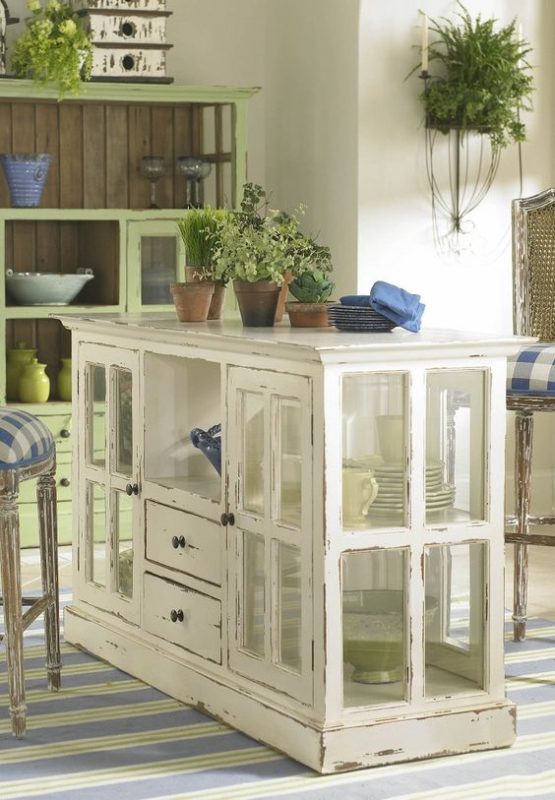
This is a great piece, it has distressed character and display style storage. If this didn’t fit in my kitchen I’d find a place for it!
TIP: You don’t need a whole hutch, even a top or bottom piece could work.
Source: our1917farmhouse
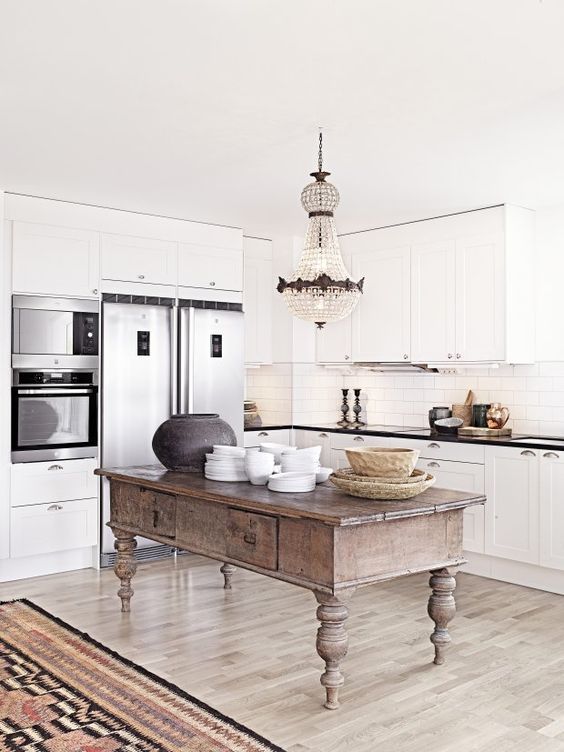
This is my fav, I actually just want to put this whole kitchen in my house lol
TIP: Having rollers on your island is a great idea so you can move it when you need to.
Source: digsdigs.com
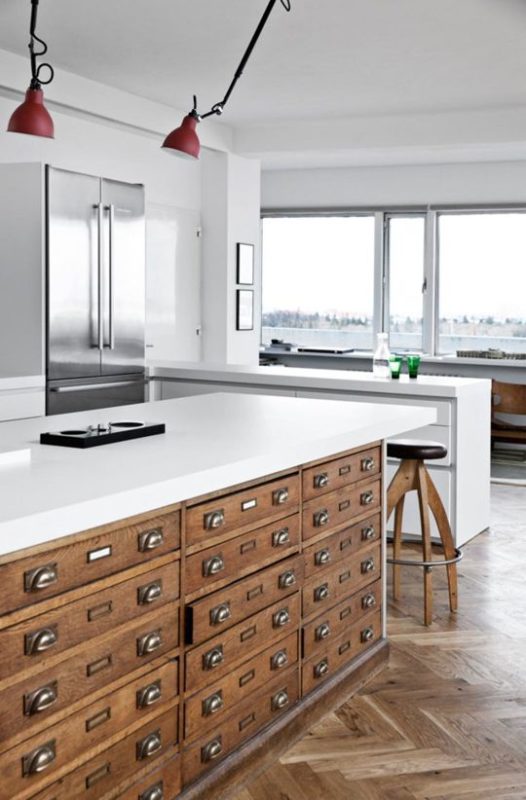
This antique apothecary cabinet is a kitchen dream! Think of all the things you can store!
TIP: Adding this vintage piece to a modern space adds a wow factor!
Source: The Farmhouse 31 via House of Hargrove
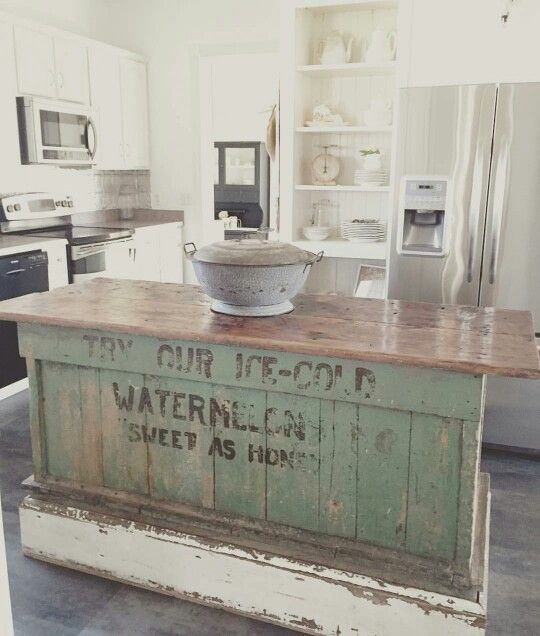
The more unique the piece the more special it becomes so don’t be afraid to think outside the box when choosing your piece…you will know it when you see it.
TIP: You could add stenciling, paint or distress any piece making it even more custom.
Source: Studio McGee via decorpad.com
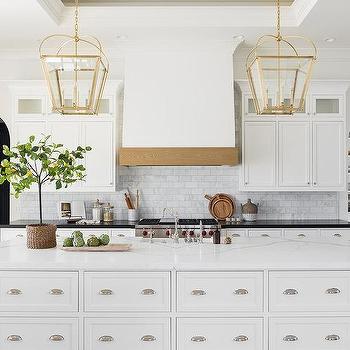
If you choose the right piece, even in a monochrome space it will still stand out and make a statement. Even though this isn’t a true apothecary cabinet you can use hardware to duplicate the style.
Tip: A piece that matches can stand out if it has an unusual feature or style
Source: Foter.com
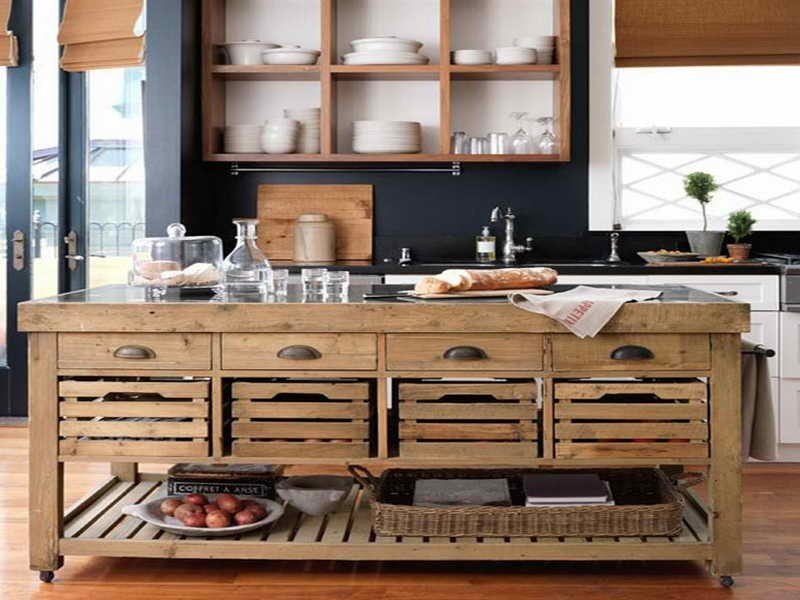
A versatile style for any kitchen! So much space and storage for large items you want to display.
Tip: you can add stone to the top of your piece
Source: designingidea.com
Sometimes you just can’t find a ready made piece to work in your space. Like this oversized kitchen that needs a special oversized island.
TIP: You can make a built look unique using different materials and textures like this piece with quartz top and multicolor woods.
Kitchen islands are one of those pieces that are made to shine. Pick a unique one and give them something to talk about…
Email me with any questions or for ideas….Happy Shopping!
Welcome, and thanks for stopping by! If you’re like me your to do lists are always longer than the day. I have been baking my whole life and nothing makes me happier than to bake for others. I would rather stay up half the night than stop and get anything store bought…so I figured out a few short cuts that will give you quick and easy cakes that are sure to impress!
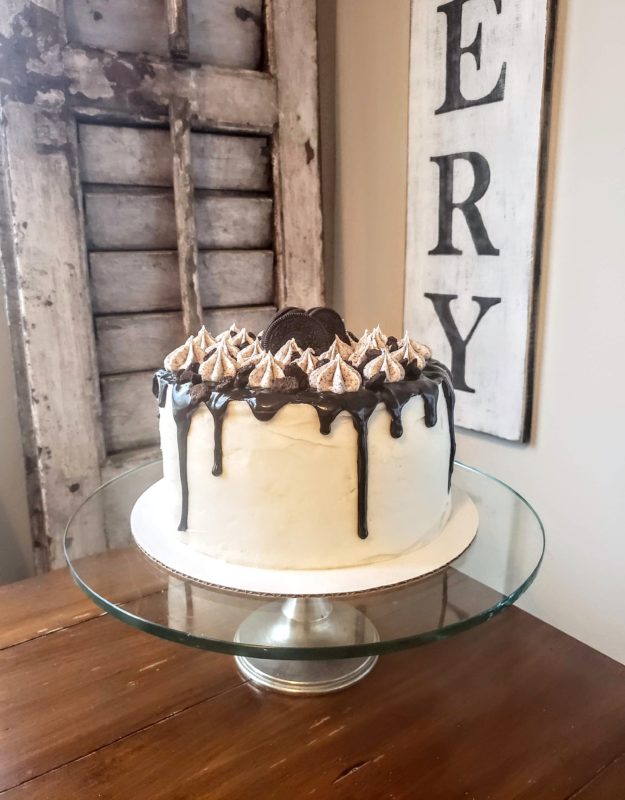
Oreo Ganache Cake/thestripedbarn.com
I used 4 devils food box cakes and a triple recipe of buttercream icing. I removed the cream in between the cookies, crushed the oreos and added the crumbs to the buttercream frosting. I frosted in between each layer and the outer cake. I also sprinkled some small broken oreo pieces in between the frosted layers. Put the cake in the fridge for 30 minutes and drizzle ganache slowly over the top
TIP: Ganache is just dark chocolate and heavy whipping cream, super easy.
You can skip the ganache if you would like and just pipe icing puffs on the top. Then sprinkle more oreo crumbs and put a few oreos in the center.
TIP: the crumbs in the frosting you are piping must be super fine or they won’t go through your piping tip!
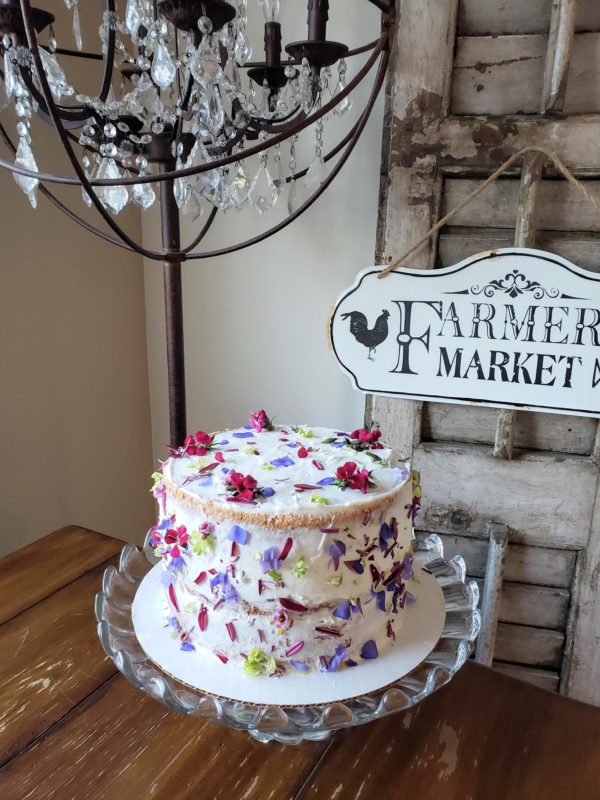
Edible Flower Cake/thestripedbarn.com
This edible flower cake is one of my favs! Just make 4 – layers with any white box cake, I used 8″. Make a double batch of buttercream icing and frost in between each layer and then frost the outside like a naked cake, which means leave part of the cake showing, and sprinkle with edible flowers.
TIP: I ice a lot of my cakes naked style because I love the rustic look and because its super fast and foolproof!
I like to sprinkle a few in between layers so they show when you cut it! MAKE SURE THEY ARE LABELED EDIBLE FLOWERS!
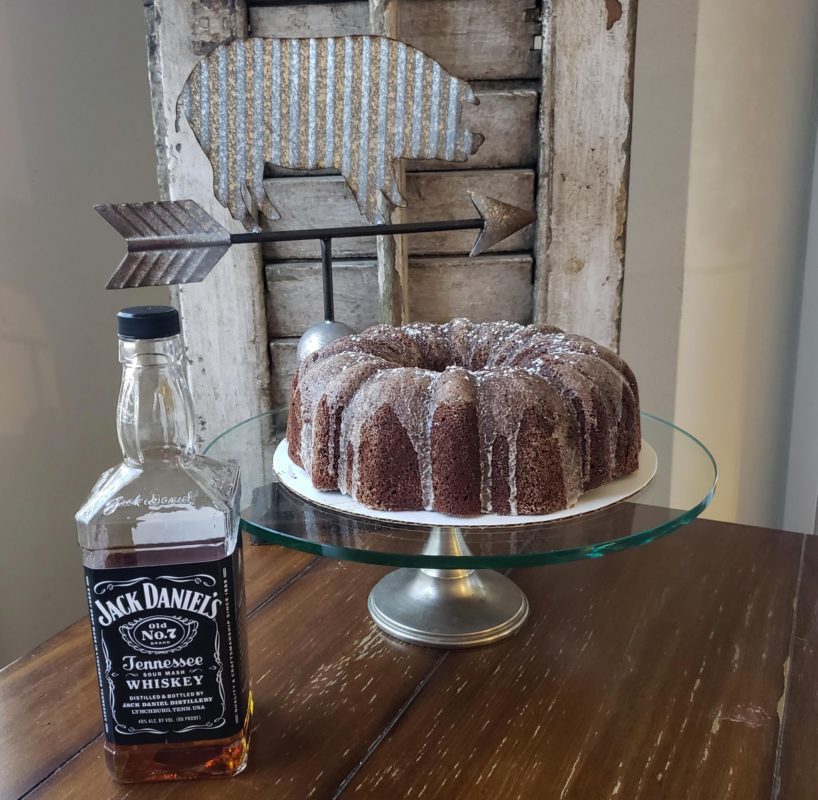
Jack Daniels Cake/thestripedbarn.com
See full recipe here. Use a bundt cake pan, add Jack Daniels and a box of instant chocolate pudding. Drizzle powdered sugar and Jack over the top while warm and sprinkle more powdered sugar when cool.
TIP: This cake has a strong Jack Daniels flavor!
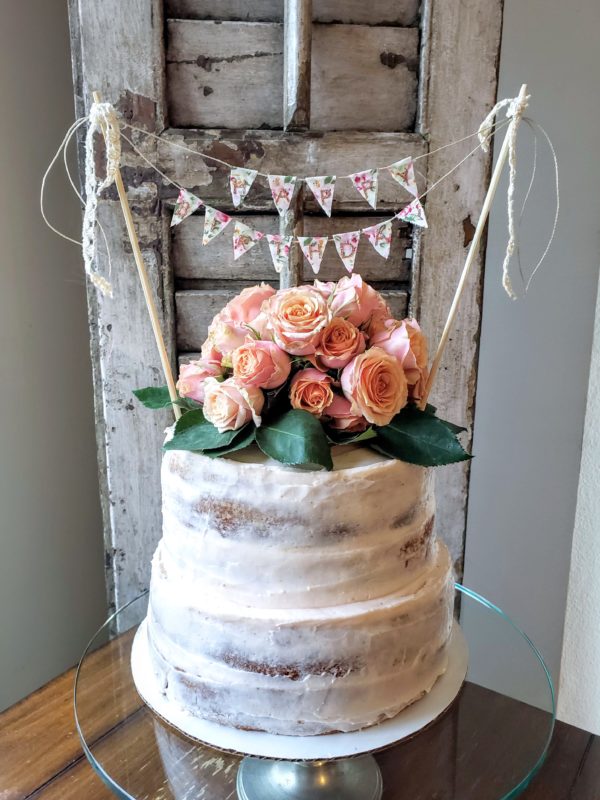
Naked layer cake/thestripedbarn.com
This is prob my favorite because of the cuteness factor. White box cake with buttercream icing. I used 6″ pans and 8″ pans and stacked them. Frost in naked cake style, add roses on top.
TIP: I cut a circle out of parchment paper and put it on top of the cake before adding the roses so they wouldn’t touch the cake.
I made the sign out of ribbon, bakery twine, press on letters and ribbon. See article here.
Pistachio cake/thestripedbarn.com
I just love this cake for the taste and the color! Cake mix with instant pistachio pudding added and baked in a bundt pan. Its that easy! This is a variation of my famous lemon cake which is everyone’s fav! All I did was use yellow cake mix and change the instant lemon pudding to pistachio pudding. Then I drizzled powder sugar and sprinkled chopped pistachios on top. The perfect spring cake! Get recipe here.
TIP: you could do this cake in other flavors, get creative!
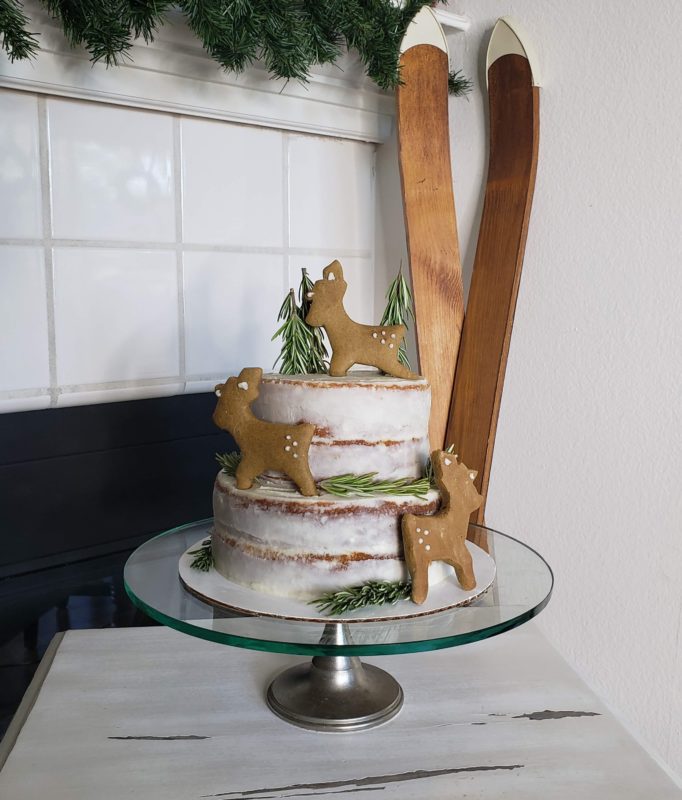
Holiday cake/thestripedbarn.com
I used the same naked layer cake as I did above. I turned sprigs of rosemary upside down for the trees and layed them around the cake. I made homemade gingerbread for the deer (no thats not quick and easy…lol but you can buy cookies or use ready made dough as an alternative)
TIP: I wanted to use a smaller deer cookie cutters but due to the issues in 2020 I could only find this reindeer cookie cutter which is a little too big but you get the idea
…you could use any cute animal cutout for this cake! Then I just piped a few little dots on the reindeer.
Tip: if you don’t have piping bags and tips just fill a small baggie with some frosting and barely cut the corner and ta da…you just made your own piping bag!
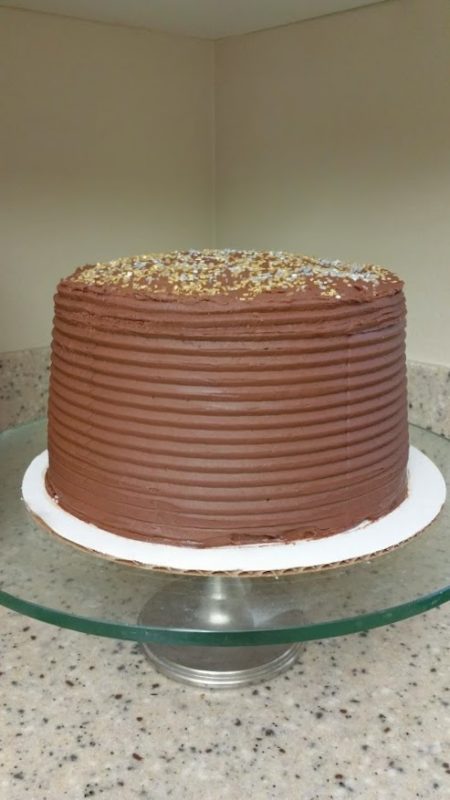
Chocolate layer cake/thestripedbarn.com
This chocolate cake is devils food box mix with chocolate buttercream frosting. I added gold and silver sprinkles on top or you could sprinkle nuts on top and between layers. I used a texture comb which you can buy online or at any Michaels or hobby store. Thats what makes it look like a bakery cake. All you do is hold the comb on the side of the and spin the cake on a lazy Susan.
TIP: If you make any mistakes you can patch or do over. I added a little frosting to fix that little indent shown in the photo…foolproof!
Have fun baking! Putting that little bit of extra time into something for someone else is priceless, especially when you see the smile on their face. That look that says “you did this for me?”
If you have any questions, need recipes or just want ideas for your next event or occasion just email me!
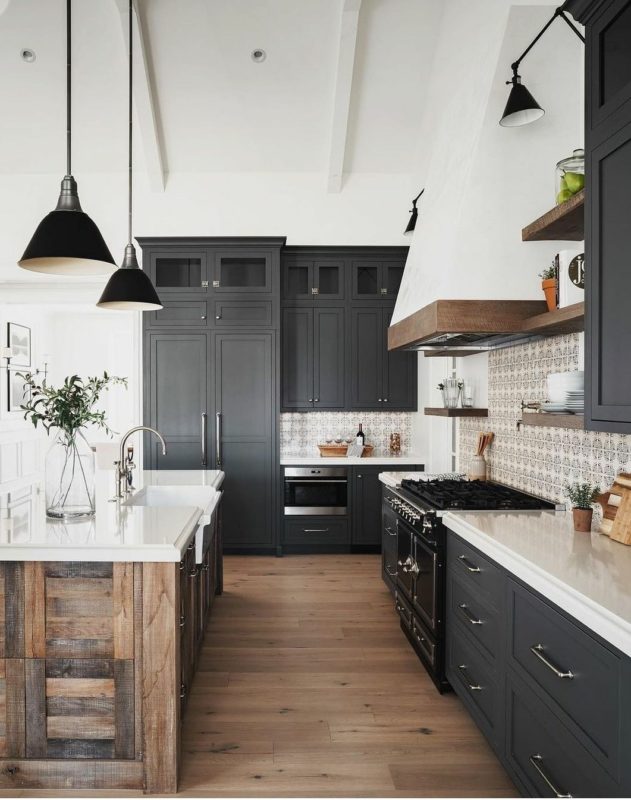
Modern farmhouse is trending in a big way! Dark chairs, trims, doors, kitchens and accessories are having a really big moment this year and I love it! This is not replacing our fav rustic look, its just a more sophisticated look…like farmhouse grew up! Will it become the little black dress of home design or is it just a trend? Only time will tell…but who cares…you know we aren’t big trend followers at The Striped Barn, we like what we like!
I was never on board with the dark appliances that surfaced a few years ago and lasted all of a moment… but I love the dark accents in doors and trims! I have always loved dark chairs and accessories to pop a space.
Colors come and go in the design world so I love being a neutral girl and popping color when and where it’s needed.
Source: @boulderparkfarmhouse
I love this space and those black chairs just make this kitchen pop… the light wood contrast with grays and copper is balanced to perfection! Tip: Metals count as color too
Charcoal gray is a fav and goes great with black accents… love the way it pops the darker colors in the wood! Tip: You can hand pick your wood pieces before it’s installed to get the look you want
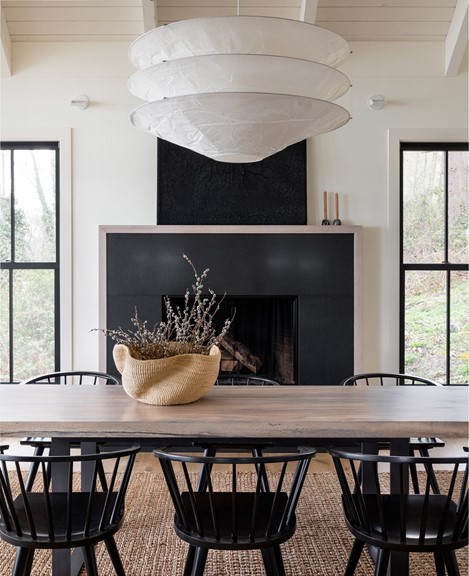
Source: marthastewart.com Credit: Haris Kenjar
This is the perfect trifecta in dark home accents! Trim, fireplace and furniture…and balanced with the light wood it’s not overdone! TIP: Less is more to create an impact
So what do you think? Will it become classic or trendy?
"Welcome, Friends of The Striped Barn!
You've found the perfect spot for styling, staging, and celebrating.
Let's connect, get creative, and share some inspiring ideas!"
")