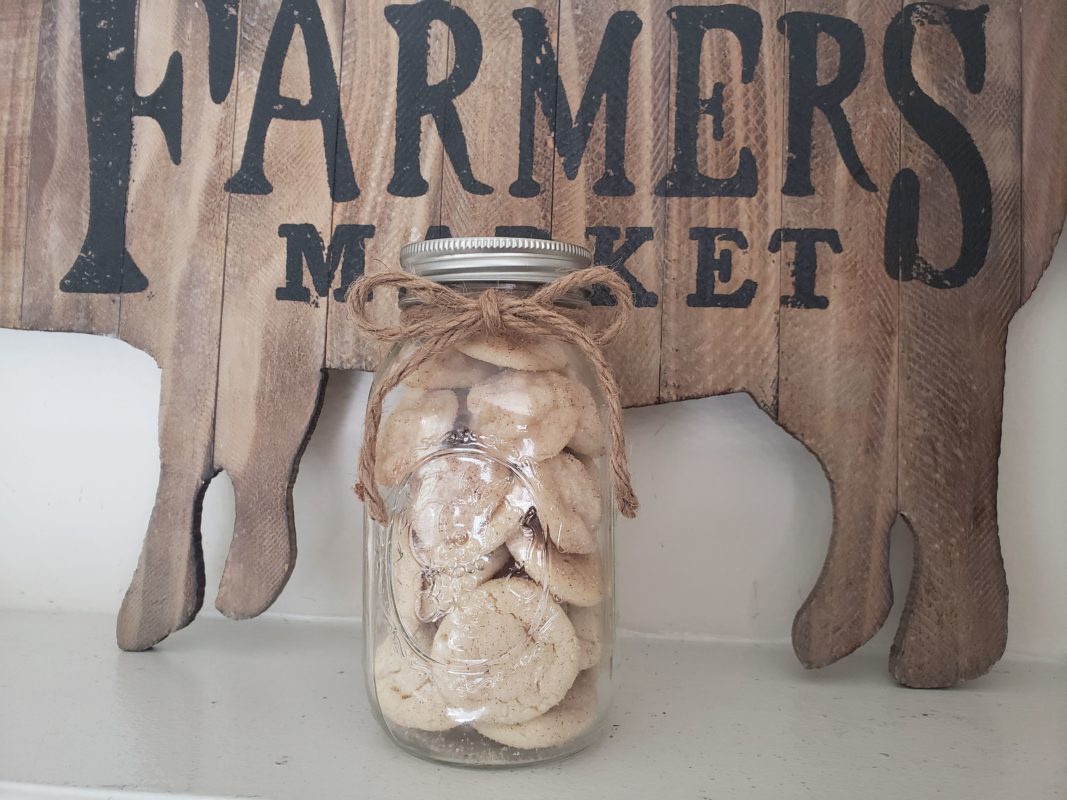
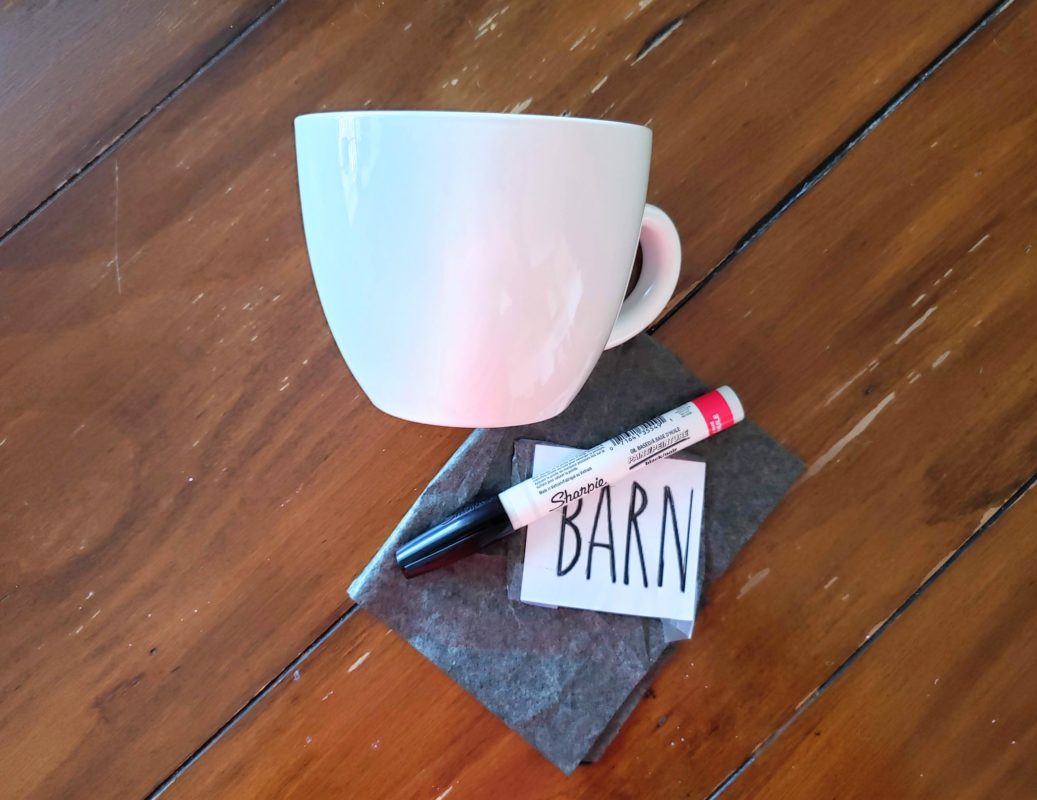
Super easy DIY project! I am Rae Dunn inspired so I decided to give it a try so I could do barn farm and ranch!
I grabbed a coffee mug from target and a oil based sharpie and went for it! First I washed the mug and wiped it with alcohol…Then I found a font I liked, copied it, blew it up and traced it on my mug with carbon paper. It took me a few tries to get it straight.. but who cares its foolproof!… If you make a mistake just wipe it off with alcohol and start over. I did tape the letters to the carbon paper and then to the mug so it didn’t move around.
TIP: I used a ruler for the straight strokes so it didn’t look like a spooky font:)
I put it in the oven on a cookie sheet and then turned the oven on…you don’t want to put it in a hot oven! Bake it at 350 degrees for 30 min. Turn the oven off and leave it in there about 30 more minutes while the oven cools back down. Done! I’ve washed it a lot and its held up great in soap and water! Think of all the things you could make!
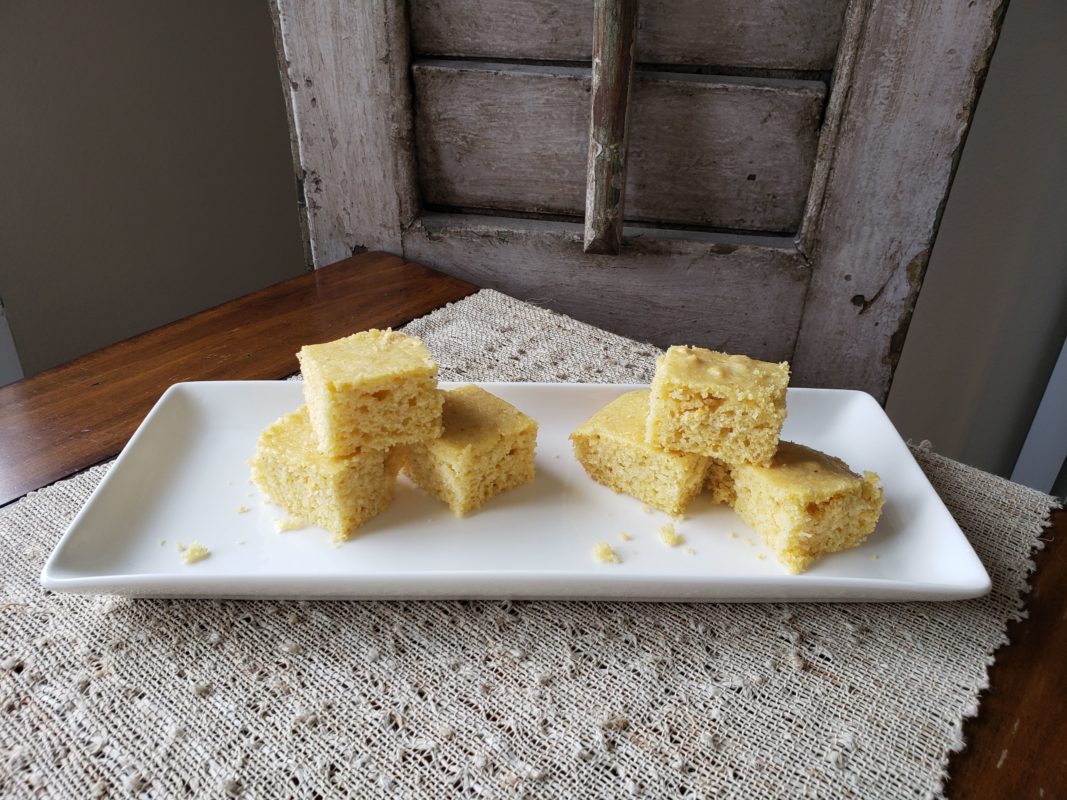
OMG…I don’t know about you but with everything shut down I am on major DIY project / baking overload! Last weekend while I was waiting for my second attempt at sourdough bread to rise, I decided to make some cornbread…my fav… to go with my homemade chili. “When in doubt make cornbread!”
everything goes with cornbread…
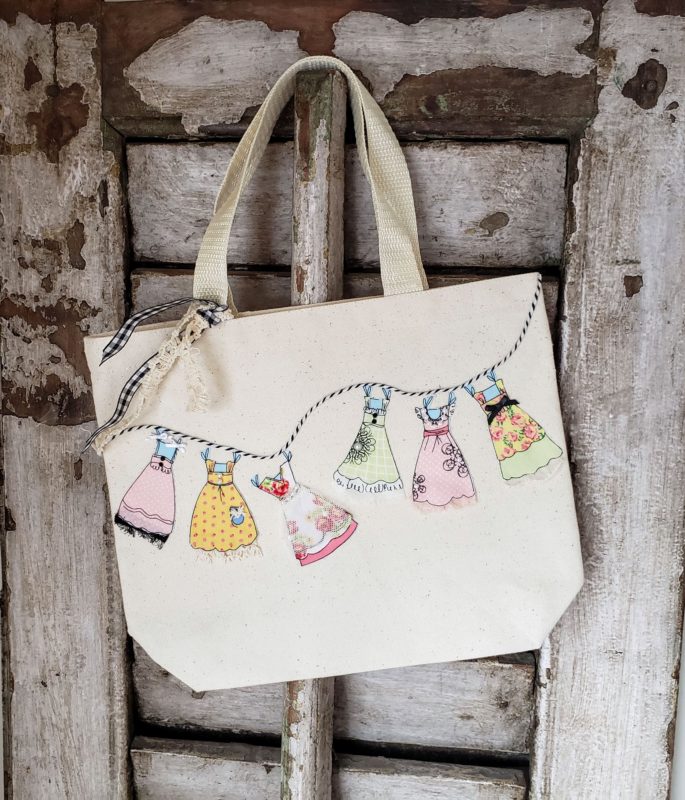
So while my cornbread was baking and my bread was rising…I decided to make some little purses for the fam with some bits and pieces of what I already had hoping it would put a dent in my creative energy which is seriously bubbling over right now. They came out super cute, so I wanted to share and I also put them in my Etsy shop!
Were all in this together, so let’s share our DIY projects while stuck at home and our Covid-19 baking ideas… I have always said…” inspiration sparks inspiration! “
This weekend….I ordered some cute rustic hooks to do a wall coat rack…so…to be continued! And hopefully I will have sourdough bread…
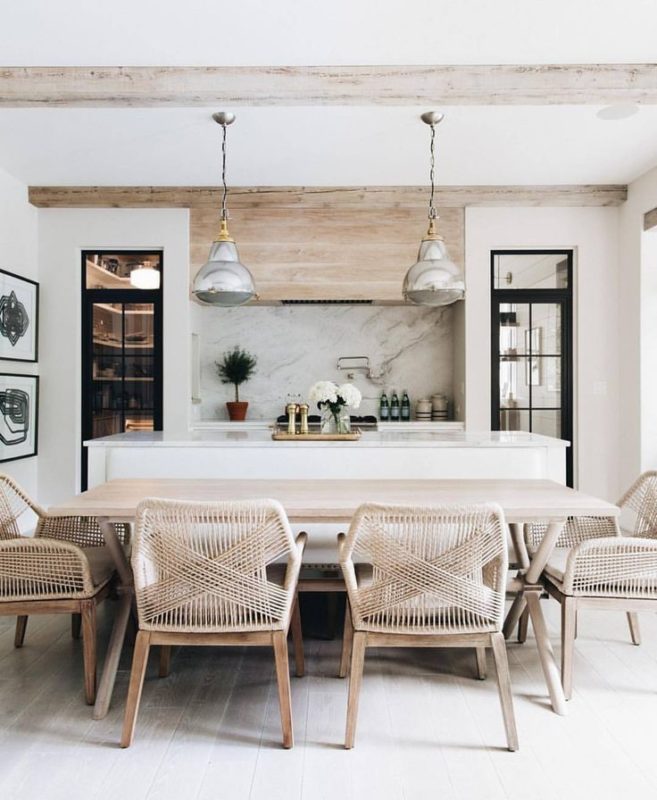
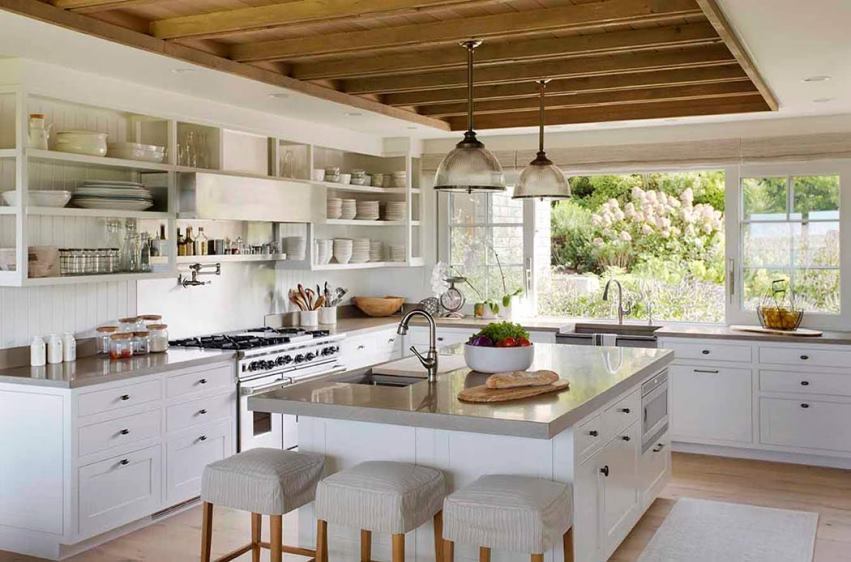
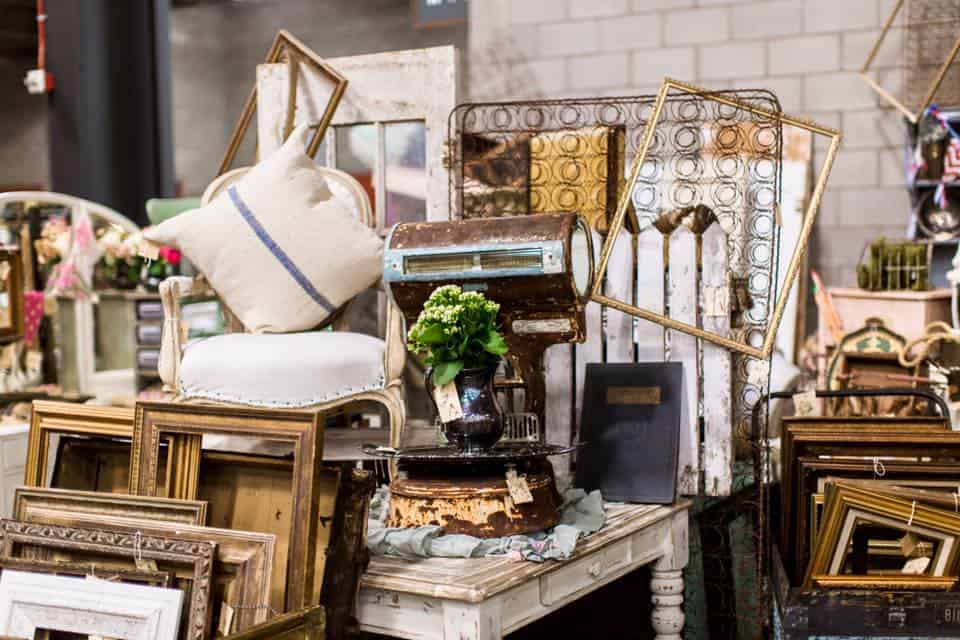
While I was writing my last blog, “how to display flea market finds”… I stumbled across these over sized, chippy, rustic signs so you know I just had to share!! They have metal and wood choices, are big, and priced great.
You found that perfect treasure at the flea market! You negotiated, hauled it out to your car which many times can be far, far away! You get home, unload it, get it inside, and admire it in all its glory. Maybe you have the exact place you want to put it…but maybe you don’t! You start searching for that perfect spot and there is no doubt in your mind no matter what you have to do you will find it!
You have 2 options, your either going to display things alone or group them in a vignette with other things.
Note: A vignette means small or short to set the scene, but important. In a display it means concentrate on that one little area.
A vignette can be on a wall, a table or on anything. It can be a theme, holiday or just a collection of things. When I create a vignette in a store it’s for the purpose of selling. When I create vignettes at home it’s usually for a holiday or because I ran out of room! I’m sure you’ve experienced the latter if you love vintage finds and flea markets!
The way you display old things makes them new again.
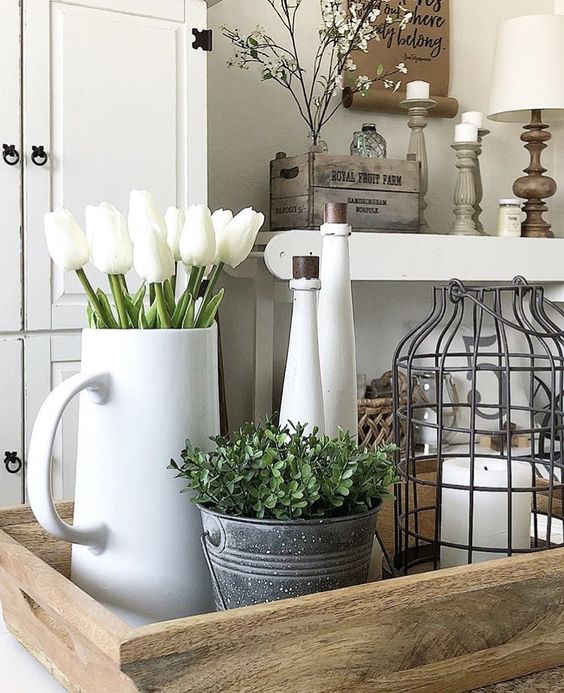
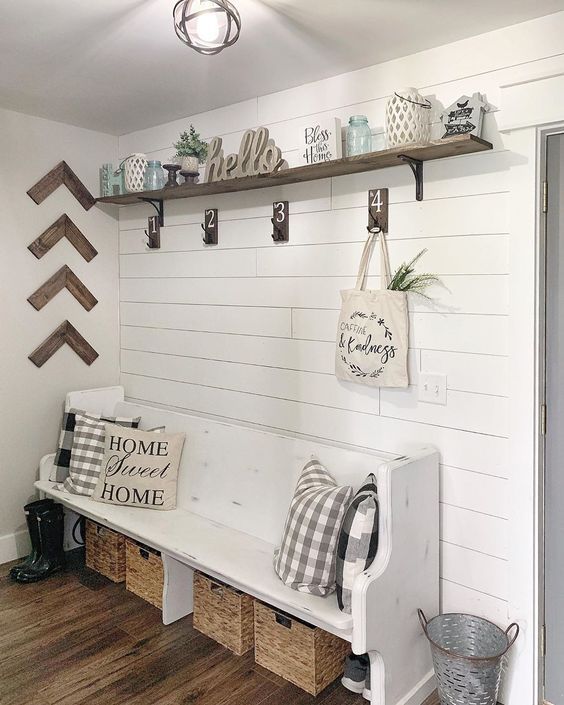
There will come a time when you have to part with something old to make room for something new, but until then just remember, a “vignette” is your best friend…it allows you to fit more in your space! These great pics are from my Pinterest browsing addiction;)
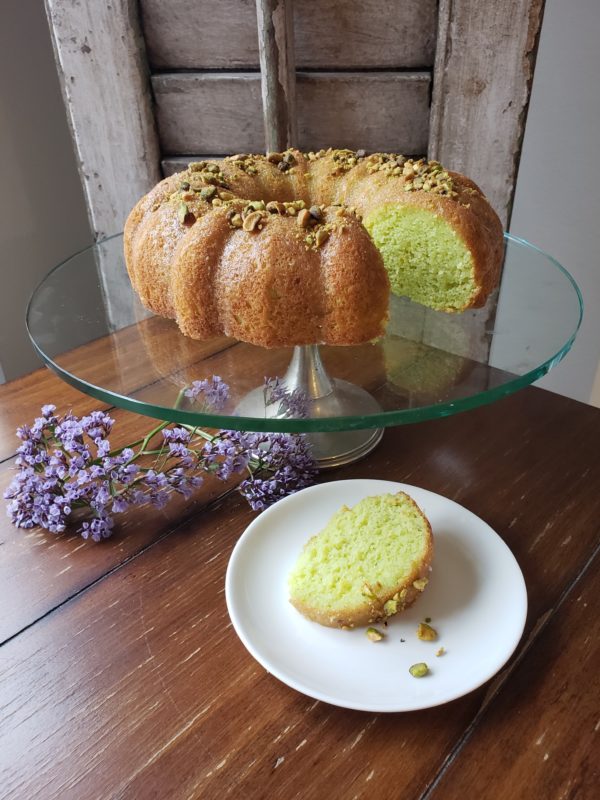
Baking to me is arts and crafts that taste good… and I love creating anything, so I love baking! This weekend I made pistachio lemon cake, rose petal bark, and sourdough bread from a starter my friend gave me. My lemon cake is a crowd favorite but I was dying to try a pistachio lemon cake twist, so instead of adding my usual lemon pudding I added a box of pistachio pudding and sprinkled the top with chopped pistachios because I love pistachio anything! It was amazing, and I love, love, love the green color! You have to experiment with baking…if you don’t try new things, you’ll never discover new favorites! I just love these, so I had to share!!
Pistachio Lemon Cake Recipe
1 box lemon cake mix, I like DH (or can use a yellow cake mix)
1 box 3.4oz lemon instant pudding (or pistachio if you want to try it)
½ c Oil
4 eggs
1 c Water
4 teaspoons freshly grated lemon rind
1 1/3 c powdered sugar
5 T fresh squeezed lemon juice
Preheat oven to 350 degrees. Beat eggs, add oil, water, pudding, and cake mix. Add ½ of the lemon rind into the mix. Mix on med speed about 3-4 min. Pour into greased and floured Bundt cake pan and bake for approx. 35 depending on your oven. While your cake is baking combine your lemon juice, the other half of the rind and powdered sugar and set aside. When your cake is done set pan on rack to cool for 5 min. before removing it from the pan. Put the cake on the rack with a sheet underneath to catch drips and drizzle the lemon juice/sugar mixture over the warm cake. (I also poke a few toothpick holes in the cake, so the juice goes inside). Once the cake has cooled you can sift some powdered sugar over the top if you would like. If I make the pistachio version, I sprinkle chopped, roasted pistachios on top.
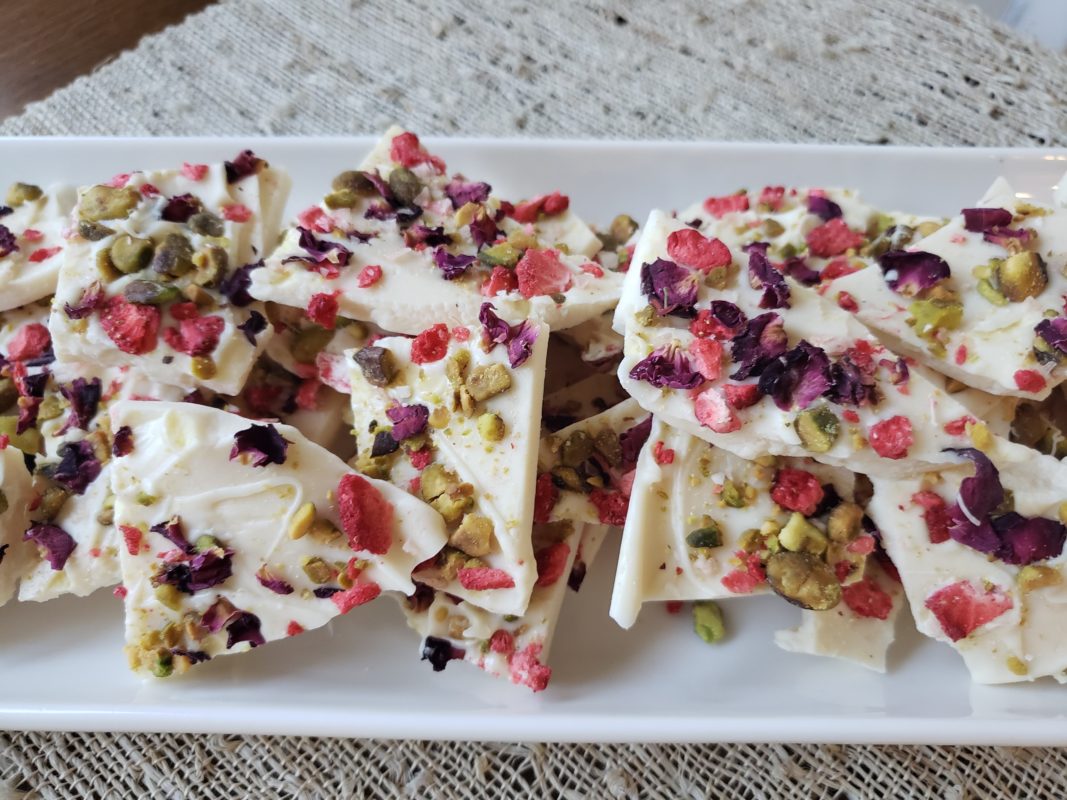
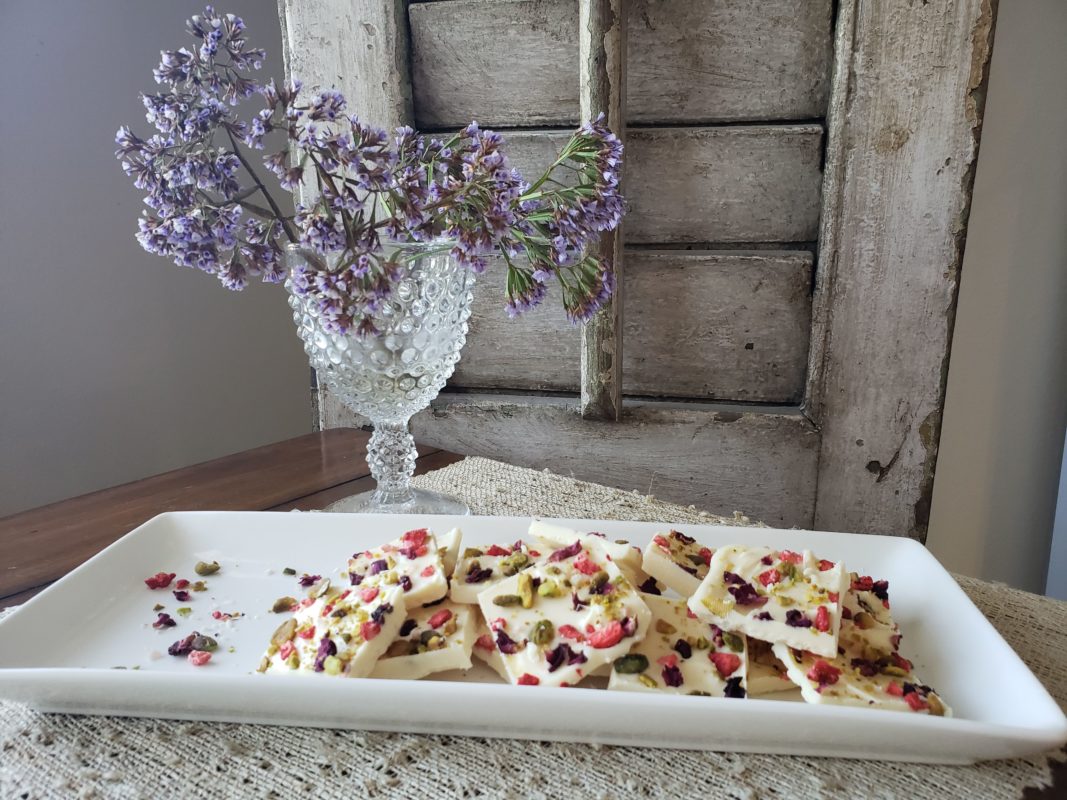
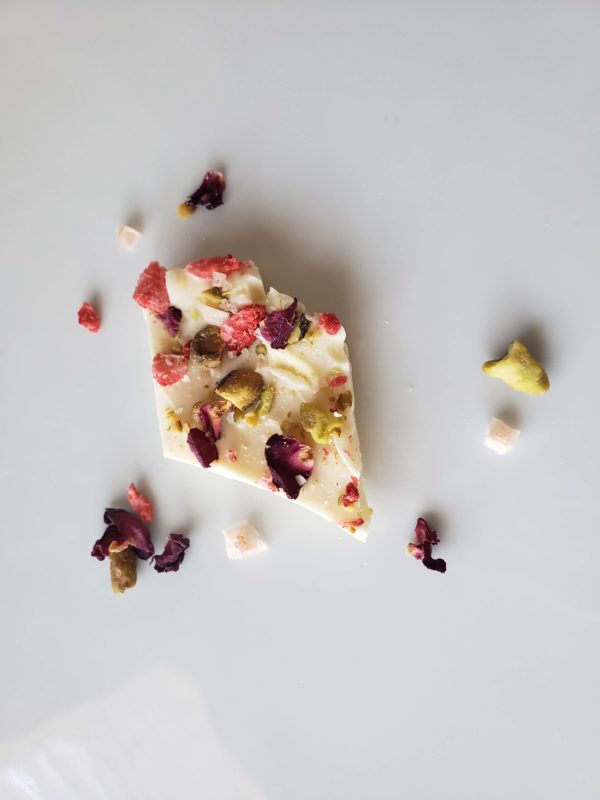
One of my many fav things to use in baking is edible flowers… they are organic, cute and something you don’t see every day! This chocolate bark is a blend of edible roses, dried strawberries, pistachios, and flaky pink sea salt. What dessert wouldn’t be good with flaky pink sea salt! I sell the “rose petal bark” and the fixings to make it yourself it if you don’t want to run all over town getting everything… just em me for more information!
Rose Petal Bark Recipe
2 bags (12 oz bags) white chocolate melting pieces
½ c —Chopped culinary roses or rose petals
½ c— Chopped dry roasted pistachios
¾ c— Chopped freeze-dried strawberries
1 tsp Flaky pink sea salt
Line a cookie sheet, or Pyrex dish with parchment paper. Melt your chocolate in the microwave and pour into the dish. Quickly, spread the chocolate around with an offset spatula or knife. You can make it smooth or rough. Sprinkle your roses, strawberries, pistachios and salt over the top and push them down very lightly, they all won’t stick and you will lose some of your toppings when you cut it so make sure you put a lot on. Pop it in your refrigerator for 15 min to set. Take it out and break it up into whatever size pieces you would like. You can also cut it into perfect squares if you would like a more finished look.
Last but not least my sourdough bread is still a work in progress and still rising so I have no idea how that’s going to go. I haven’t made bread in years! I keep picturing it rising out of the bowl and taking over the kitchen! So….”to be continued” on the sourdough bread!
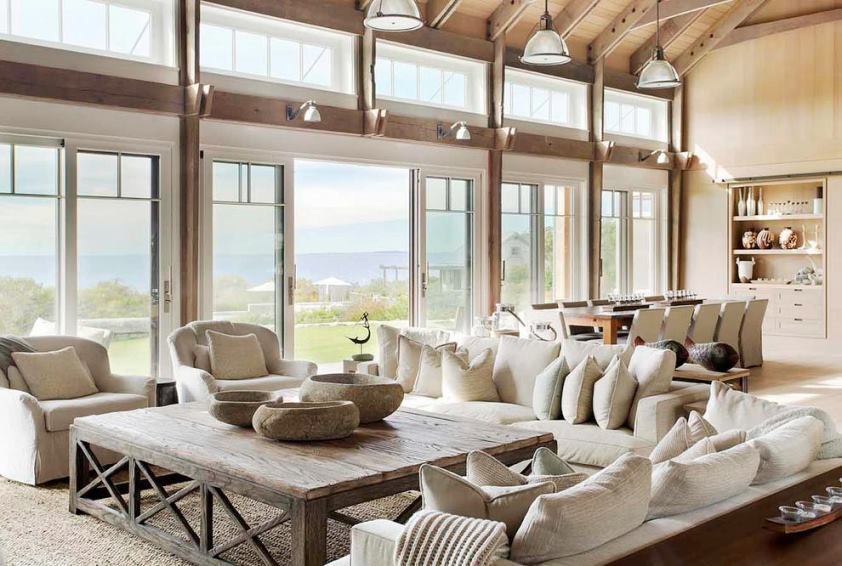
Hi Friends! We are in the era of DIY now more than ever! This beautiful photo is the Villa Cortille from one of my favorite sites Decoholic.
As a woman general contractor and a DIYer I have learned some tips and tricks to pass on! I am so excited that you all are jumping in too! First, keep in mind not all projects are created equal…use professionals if the project is too big, you don’t understand it, or you are not qualified to complete it. So arm yourself with some blue tape, a big tape measure, start small and go for it…there’s nothing like a DIY project!
Start with hybrid projects…they are great so you can do the phases your comfortable with and hire the professionals for what they do best!
There are 2 things that are nonnegotiable!. Do not to attempt anything yourself that is not SAFE and could cause damage or harm. The Average is 15% upfront with some exceptions. Just remember if the amount raises a red flag its probably for a reason!
1 – Negotiate – everything is negotiable, paint, tile, wood…anything.
2 – Order it yourself – ask your installer what you need and order it, unless they give you a bigger discount. Specialty stores are very knowledgeable and helpful. Be sure you have everything that is needed to complete the job. You don’t want to order trim pieces or extras after the fact, they may not match.
3 – If you have a good sub ask for referrals. They usually have a network of the same caliber of work.
4 – If it requires a permit you probably shouldn’t be doing it yourself. Stick to the small projects.
5 – Always get 3-4 verified referrals before hiring anyone. Don’t just read yelp reviews.
6 – Check all of your subs license, bond and insurance. If they are doing work for you they should have it all.
7 – Educate yourself so you know about the project your sub is working on. Know what they are ordering, why you need it and if they are doing the work or hiring someone else to come in.
8 – Source your own materials, I guarantee you are paying someone by the hour to find your products and materials. You can even pay for the materials yourself and pay your sub separately. Order 20% extra for most products in case of problems or damage especially flooring and stone.
9 – Communicate with your contractor or subs and don’t be afraid to speak up. They are working for you so have confidence. Just don’t call them at all hours of the night, they have a life too!
10 – Get yourself some blue painters’ tape and put pieces in places or on items that have issues, or you may have questions about. Make a final “punch list” which is a list of all the things that need to be fixed before final payment! I am known for my blue tape and punch lists!
So that’s my tips, I hope they help! If you have any questions feel free to em me!!
“Sometimes I open my mouth and the truth, it just comes out!” …Lemon Breland
You do not need to be an interior designer to shop like one, and I am going to spill the secret and tell you where we shop and how we shop. Being an ASID designer and a general contractor has its perks and I am always asked “How do I become a designer so I can get designer discounts?” You can get them now!
First, we are people, not superheroes. We spend hours sourcing and googling just like you. We walk into the same stores that you do and shop at the same stores …tada that’s it! Orient Express furniture is all over the internet on sites like Amazon, Overstock and Wayfair. We may have a connection here and there and know about some really cool places but that just comes with experience!
Orient Express Furniture
Second, all you need is a resale number and a business card, and you can buy just like us. You get the same discount, the same products, and the same service. When we walk into the design center that’s all we have, we aren’t armed with portfolios, degrees or referrals…we have a resale number and a business card…boom…that’s it!
Third, do not ever be afraid to walk into a store, ask online or call a company to see what their requirements are…I promise, they are not going to give you a test on interior design!
Fourth, most of your home stores have a discount if you ask, but many of them have a “designers” discount of a little more. Restoration hardware, pottery barn and living spaces all give designer discounts. But many times, we are shopping where you are shopping!
Fifth, we live at TJ Max, Home Depot, and all of the other stores you already shop at. We just take off the tags and present it differently.
That’s all the secrets I have to spill today but check back as I reveal “How to work with contractors!”
I think everyone should love their surroundings so please email me with any questions!!
Yes, a beach barn!! Posts, beams, neutral, texture, barn doors and big windows…one of my new favs for sure!
As you prob know, I am not a beach girl, I am a lake girl, and I have really been missing Colorado lately. So, as I shopped Pinterest today looking for my country, farmhouse inspiration to cheer me up, I ran across this beach barn!
You only have 2 factors when you shop for your dream home…location and design. Design is easy, you can transform anything, and you have full control…. location might be a little more challenging but with persistence you can have it all!
Credits for house and design to Hutker architects & Liz Stiving-nichols of Marthas Vineyard Interior Design and Pinterest
Find your location first unless you’re in a temporary situation and then go for that look that feels like you clicked your heels and landed in your dream home!
There are no rules in design style…so whether it’s a beach barn or a mountain beach house you can create anything you want!!
Ah Ha! …you are creative after all, and you found a creative outlet…baking! I love that so many of you are taping into your creative self through this challenging time! Creativity really does calm you down and gives you a great reason to bake…“Aka the real reason to bake: to stress eat all the sugar you can get your hands onand to make comfort food you can relate to…but we’ll call it a creative outlet”…eating it when its done is just icing on the cake! No more “I don’t have time excuses” just go for it!
Social media is bulging right now with pictures of apple pies and cookies and cakes.There’s even churros, doughnuts and breads! I am seeing so many posts from others searching for flour and yeast! Even ads willing to trade tp for baking goods! I never saw that one coming! Trust me I know when times get tough, I bake, so flour was one of the first things I went after when this started! All my life and to this day, if anyone that knows me walks in and sees me baking and its not a holiday or occasion, they say “so what’s wrong?”
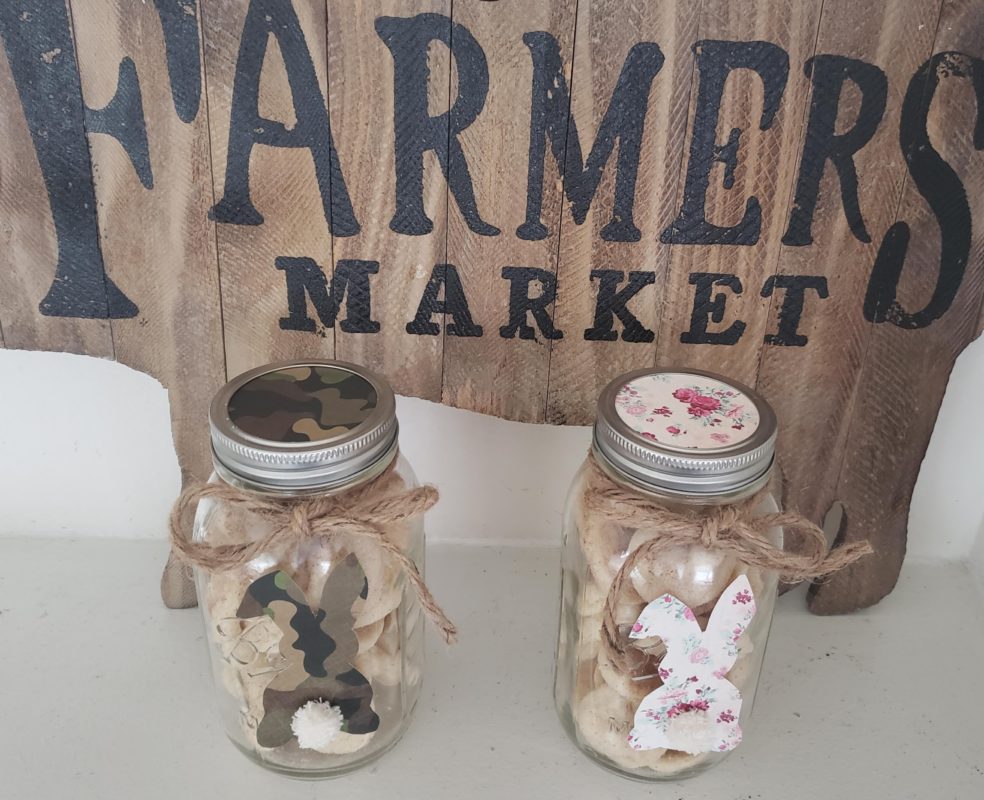
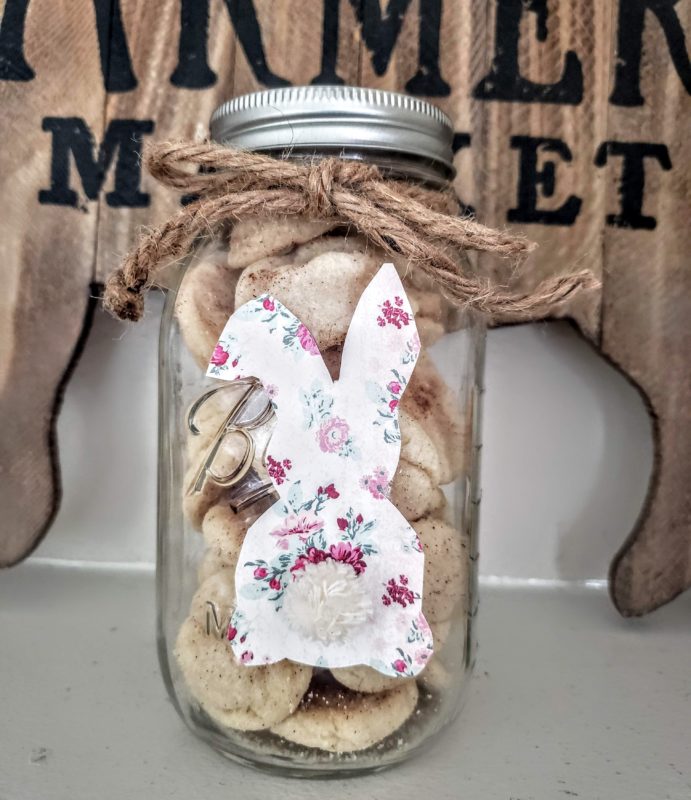
Ah ha…so maybe… you really are a baker and you just never had the time or made it a priority to “stop life and bake”? See for me I actually “stop life TO BAKE”. OK so I’ve been a baker since the age of 5 when I used to pull the chair up to the sink so I could reach the mixer. OK sometimes standing on a chair didn’t end well but most of the time it made the best day ever! I love snicker doodles and I love peanut butter cookies they are both my all-time favs! So this weekend I made snicker doodle Easter gift jars!
So cute, quick and easy!
For the kids jars I used scrapbook paper for the lids and bunnies and pom poms for the tailsYou could also write on the jars and personalize if you would like!
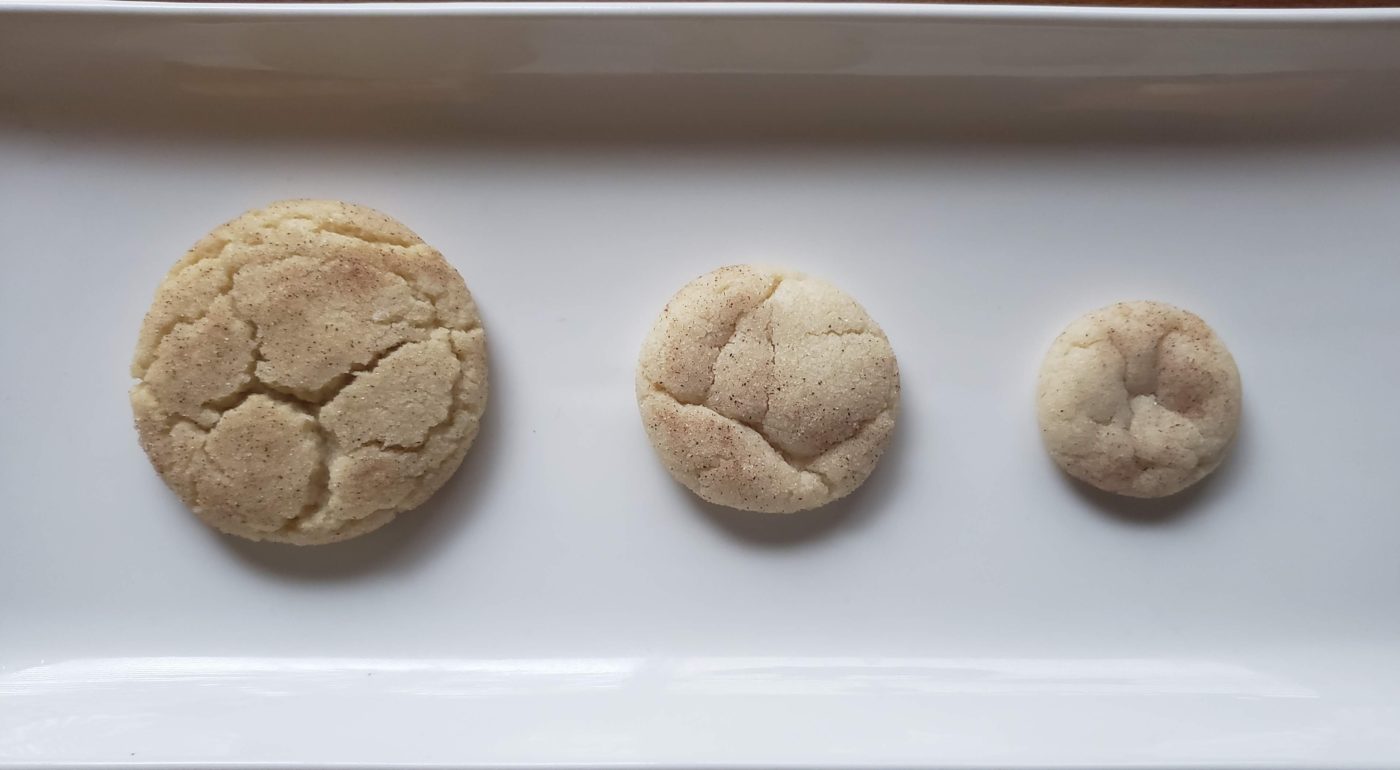
My sizes: The largest size is my regular size I make with a cookie scoop; the medium size is from a melon baller and the small size is from a tsp. I found small or medium works best in the jars! Making the small ones takes some patience but they are so cute and bite size! Tip: Adjust your cooking time if you make tiny cookies, they bake in about half the time!
Maybe you’ve been afraid of being judged when you finished. What if no one liked it or it wasn’t pretty? The best thing about baking…
“you can eat the evidence and start over”
Baking is temperamental and I even make an occasional mistake on things I’ve been making for years, but its usually because I’m not paying attention..multi tasking while baking is truly an art!
Are you a baker at heart, baking your way through anxiety, baking to save money, baking for comfort or family, or baking so you don’t have to go out?
I am glad to answer any questions or give you any ideas! I would love to hear from you if you are baking! Why and what are you baking?
It’s almost the end of Feb which is fine by me since Jan is always my least eventful month. I love Fall/winter, the holidays and winter but with a little sun this weekend, and a few days off I’m now on the Easter train to spring! I try to stay ahead of the next curve so I can help you celebrate all the fun, exciting seasons and holidays!
So this weekend my mind shot to the next chapter spring. So
my mind cannot simply just go from winter to spring… oh no, it has to make a
whole lot of stops along the way.
So in my mind spring leads to Easter, which goes to flower
everything, and should I skip St Patty’s day, what’s new in crafts this year,
new home designs, try some spring deserts, what colors are in this season,
what’s trending, weddings and parties are here, mothers and father’s day will
pop up soon, and 4th of July is right around the corner. Yes, I know it’s
exhausting…but I wouldn’t trade all the creativity of seasons and holidays for
anything!
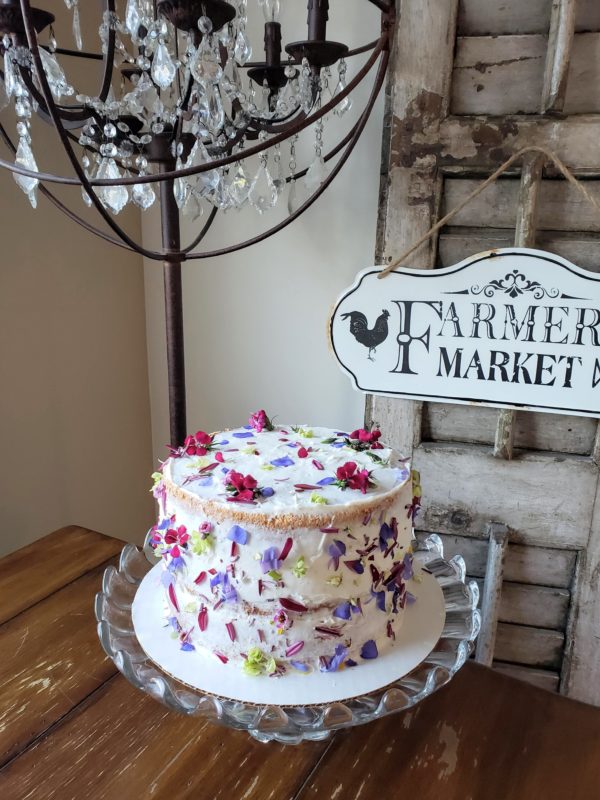
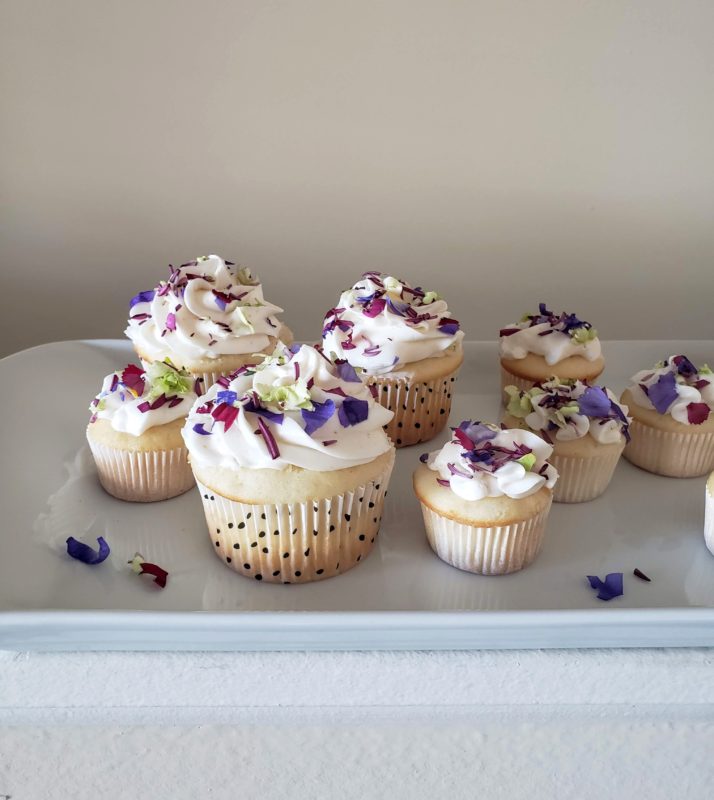
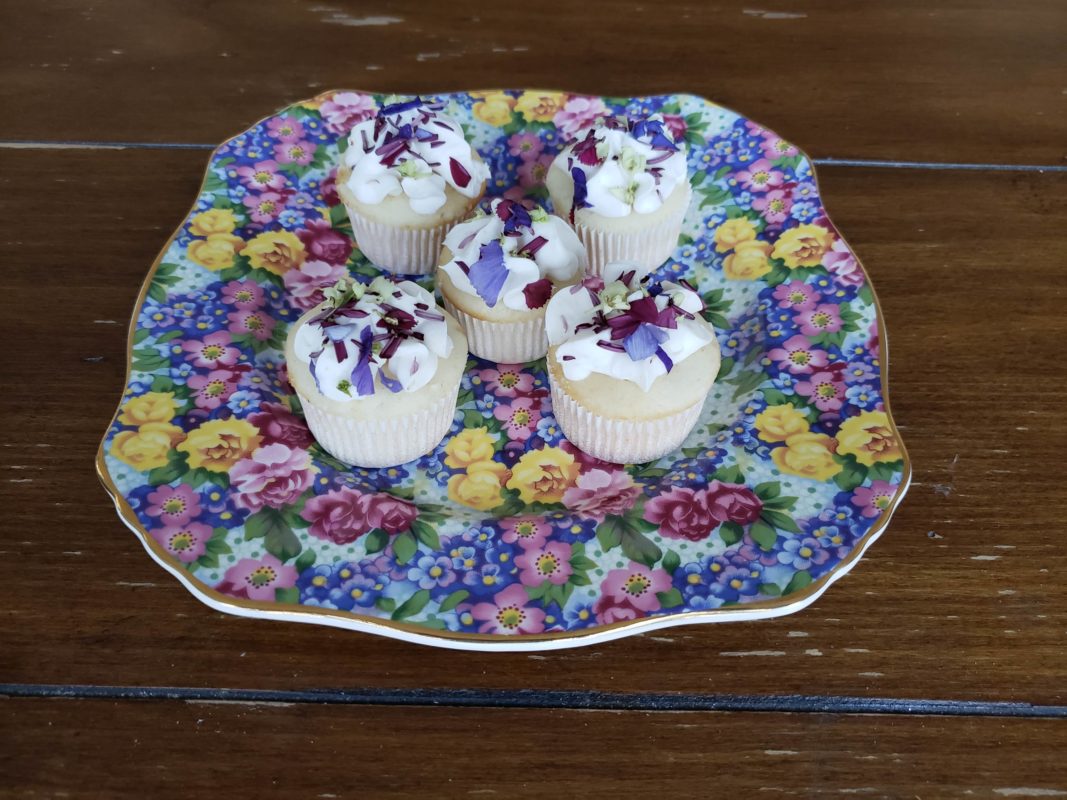
This weekend spring baking won and I decided to do an edible
flower naked cake and cupcakes
I think it was a combination of the sunny day reminding me
of spring flowers and wanting to hone my wedding cake skills. Plus I knew it
wasn’t time consuming! Whoever started the naked cake trend is genius…so quick!
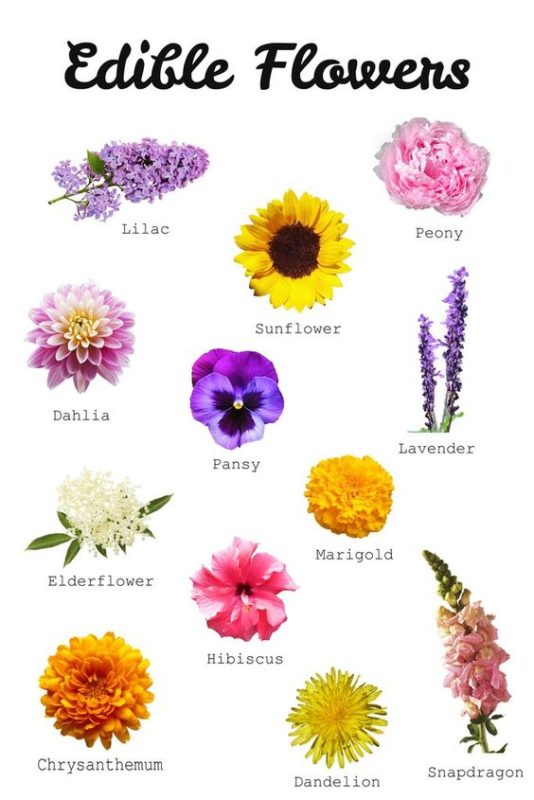
You just cut up edible flowers and make confetti and just sprinkle them on your cake or cupcakes. It was that easy! Be sure you have edible flowers which you can order on Amazon or online. I like the ready made ones online you get them the next day and don’t have to worry! They also have some already cut into pieces or you can just cut up whole flowers like I did.
You can also grow your own if you use the right flowers and
soil made specifically for consumption but make sure you research it
thoroughly. The soil and flowers need to be organic and free of any pesticides
on or around the plants.
Here’s an example of a list I found on Pinterest, … double check before using any of them since I don’t know the source. Even if you don’t actually eat them and they are just decoration they are still touching the food you are eating …better to be safe than sorry! Melissa’s, Amazon and gourmet sweet botanicals are a few sites that sell edible flowers.
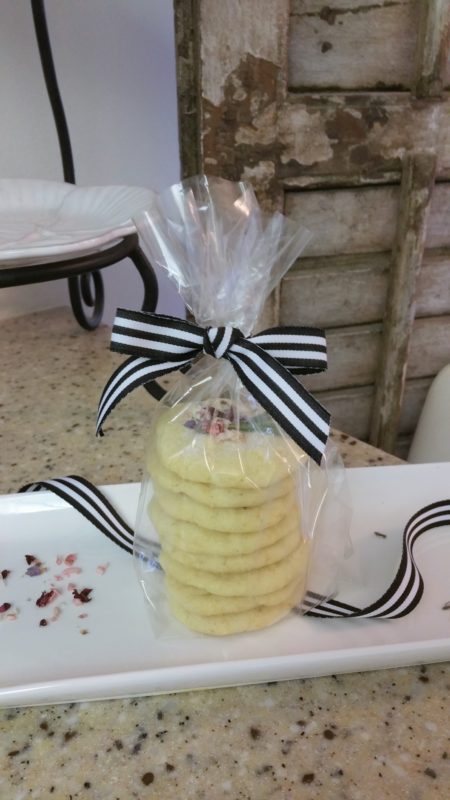
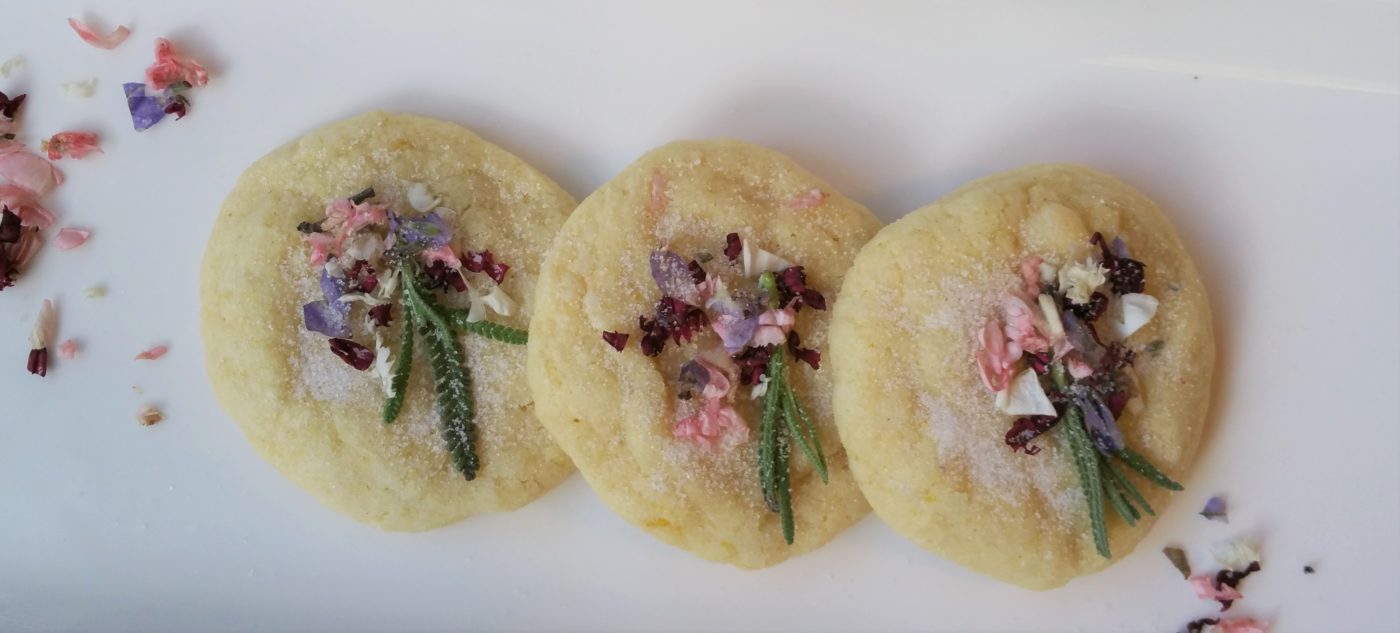
I use pansies, cornflower, lavender and violas all the time and I sugar coat them for cookies and cupcakes! You can also throw them in salads, drinks or just top of your fav dishes and desserts. Include some in your next brunch and watch the wow factor they create…I love them on top of pancakes, french toast or waffles! These are really cute for gifts or favors…just put them in a snack bag and add a bow!
Another trick that’s super easy. Just take 1 egg white, 1 t.
water and mix together. Using a small paintbrush coat your flower with the
egg/water mixture and then sprinkle with fine sugar. Put on a parchment lined
baking sheet and let dry overnight. You can then store them up to a few months
so they are great to make ahead!
Try this at your next party or gathering, it will be sure to impress. Remember presentation is everything so get creative with your favorite serving pieces!
Seriously…it’s foolproof, sure to make a statement and just the right touch of spring or summer! So quick and easy!
"Welcome, Friends of The Striped Barn!
You've found the perfect spot for styling, staging, and celebrating.
Let's connect, get creative, and share some inspiring ideas!"


")